HP Split 13-r010dx Screen Replacement
ID: 100300
Description:
Steps:
- Locate the four screws at the bottom of the device. (Note that the keyboard attachment is missing from this device.)
- Use a Philips head #0 screwdriver to remove each of the screws (Size: 4mm)
- Gently wedge the plastic opening tool in between where the display and back panel meet.
- Slowly and gently apply force to the plastic opening tool in a downwards motion to loosen the front panel from the back panel.
- Rotate the device so that the side is facing up and repeat the previous step for the sides.
- Do NOT attempt to wedge the plastic opening tool on the bottom . Once the sides and top are loose you are ready to continue to the next step.
- Gently and slowly pull the front and back panel away from each other (in opposite directions). ( Pulling them apart will not separate the two panels)
- Only separate the panels by a few inches from each other so that there is room to separate the front and back panel in the next step. Proceed to the next step.
- Hold the back panel firmly and pull the front panel upwards to completely separate the front panel from the back panel.
- The device is now ready to be repaired or replacements installed.
- Use the PH1 screwdriver to remove eleven 4mm Phillips screws.
- Unscrew the two 2mm zero insertion force connectors. Slide aside the white wires to properly unscrew.
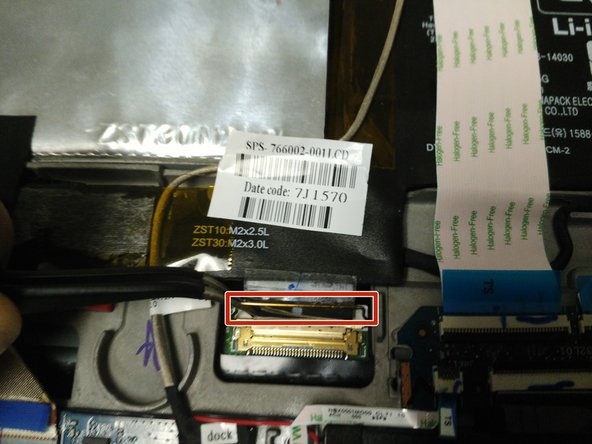
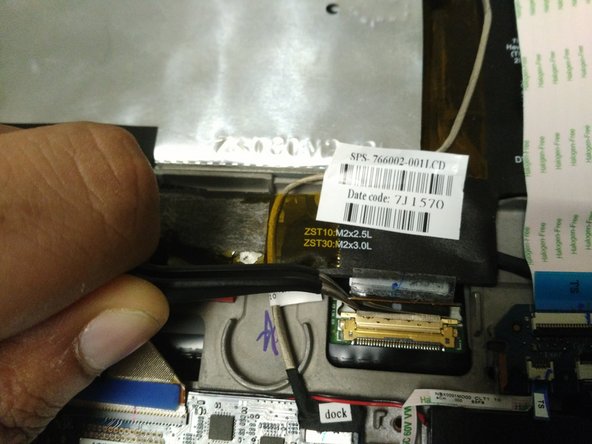
- Use a pair of tweezers to pull up the yellow colored display cable connector.
- Pull it to the direction of the cable.
- Glue is attached at the edges. Apply force to the sides of the tablet. Separate the digitizer from the body of the tablet.
- Replace the old screen with a new one.
- If your screen is broken or damaged, use caution when pulling the screen from the tablet to avoid self harm.