Acer Aspire V5-591G-75KE Power Jack Harness Replacement
ID: 100477
Description: This guide will help you identify, remove, and...
Steps:
- Close down the display and flip the device upside down.
- Use a Phillips #1 screwdriver to remove 18 black 10mm Phillips Head screws in order to loosen up the protective bottom casing.
- With the screws removed, flip the device right-side up and open up the display.
- Run a plastic spudger tool along the seam of the face-plate in order to loosen up the protective bottom casing.
- Popping sounds are normal, but forceful prying can damage delicate components. Be especially careful near the USB and HDMI ports.
- Close the display down once more, and flip the laptop upside down, with the hinge facing away from you.
- Do not yank the bottom casing off. There is a small speaker wire that connects it to the motherboard.
- Taking note of the small speaker wire, gently lift only the left side of the bottom casing.
- Using a pair of blunt tweezers, push on the tabs of the small white connector to separate it from the motherboard.
- The entire bottom casing should lift with no resistance. If there is too much resistance, verify you removed all the screws, and run the plastic spudger tool around the face-plate again.
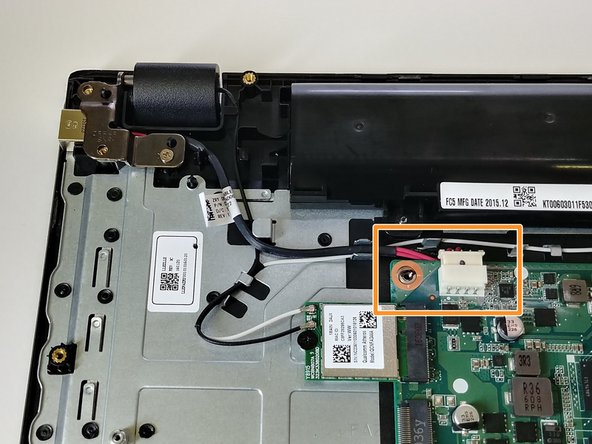
- Locate the power jack harness on the upper left quadrant of your device.
- Note where the power jack harness connects to the mother board of your device.
- With a pair of blunt tweezers, push on the side tabs of the connector to disconnect the harness from the motherboard.
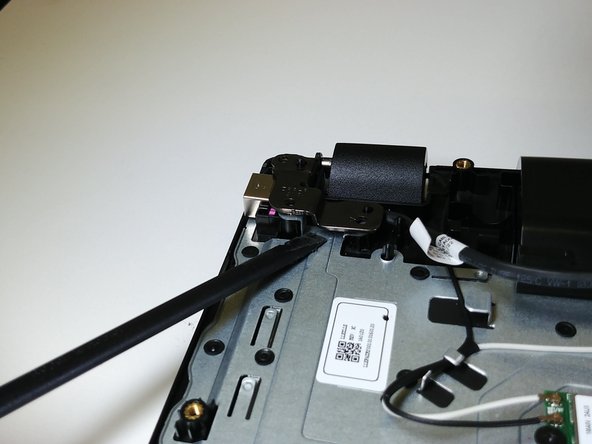
- Using a Phillips #1 screwdriver, remove the single 10mm Phillips Head screw located on the hinge.
- Wedge the spudger tool below the hinge, and lift only enough to get a grip with your fingers.
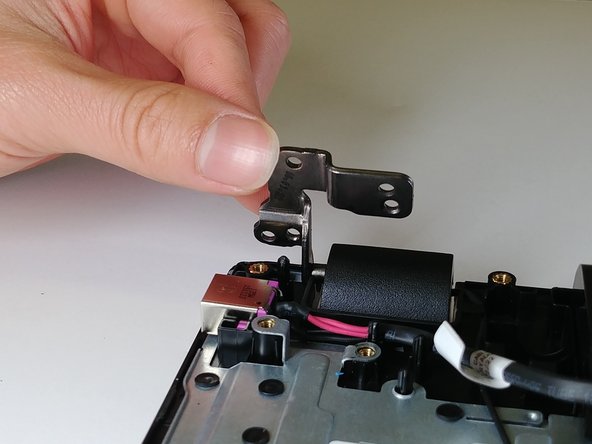
- Use your hand to lift the hinge the rest of the way to avoid damaging your spudger tool.
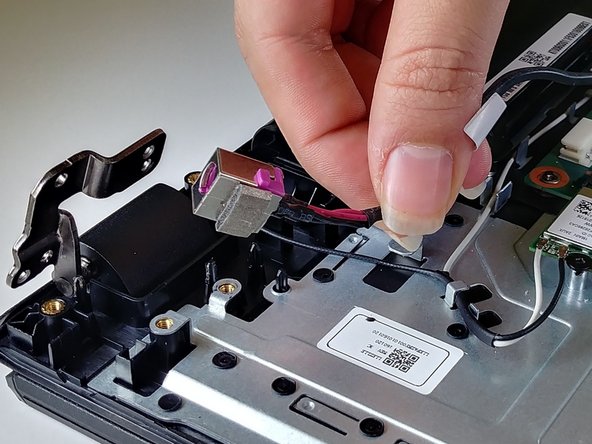
- Wedge the spudger tool below the port harness head, and lift straight up until the side tabs clear the channels on each side.
- There is a piece of tape holding the power jack harness in place, which will give you some resistance. Prying through this tape will not damage the harness.
- Lift to completely remove the rest of the power jack harness out of the casing.