ASUS GL752VW-DH74 Screen Replacement
ID: 100510
Description: This guide demostrates the removal of the Asus...
Steps:
- Remove the 3 small screws located underneath the disk drive.
- Unscrew the nine remaining 8 mm Phillips-head screws on the back of the device.
- Use the opening tool to pry the back of the laptop case from the top
- Disconnect the 3 cables connecting the motherboard to the keyboard.
- Unscrew the two 8mm screws attached to the battery
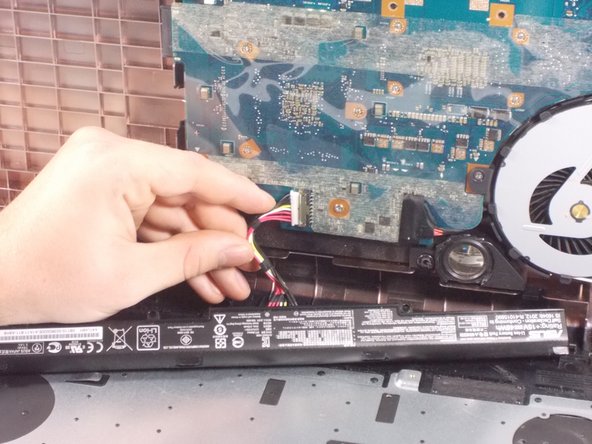
- Disconnect the bundled cable connector and remove the battery.
- Follow the Battery Replacement Guide and remove the battery.
- Unhinge the two hinge covers on the back with a unhinging tool.
- This is done to ensure the plastic hinge covers are not damaged.
- Remove the two tape covers and screws on the screen bezel.
- Use the metal spudger tool to pop out the screen bezel from all four sides.
- Remove the SATA cable attached to the screen.
- Unscrew the following screws and remove the screen from the casing.