Lorex MC6950 Motor Replacement
ID: 100611
Description: The 1.5v DC motor of the Lorex MC 6950 is to be...
Steps:
- To remove the motor, you must begin by removing the three screw caps and the 15mm JIS 0 screws associated with them located on the plastic containment shell that the camera is in.
- Next, the camera must be removed. A metal spudger will be useful to pry this out as it is sealed inside the outer containment shell.
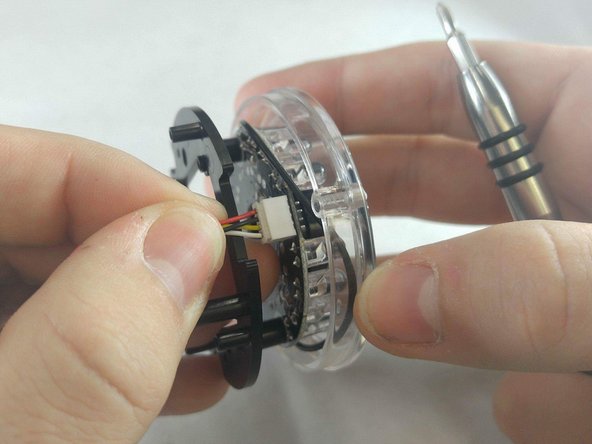
- Once the camera is removed, remove the wires from the outer containment shell.
- Be careful. The metal spudger could damage the camera if not handled with care.
- With the camera in hand, the circuit board must be separated from the LED containment shell. There is a 5mm JIS 0 screw at every corner of the circuit board.
- The wires attaching the circuit board to the shell should be removed as well.
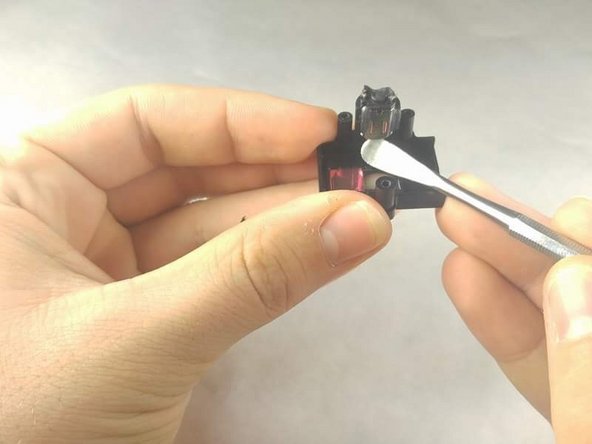
- Now the motor housing must be removed from the circuit board. There are three 5mm JIS 0 screws located on the lens side of the circuit board that need to be removed.
- The motor will be sealed in the housing. It can be removed by using a metal spudger to cut the seal. Any common sealant can be used on the replacement motor.
- The motor housing will need to be soldered back onto the circuit board after the new motor is placed. The wires should come from the circuit board and connect to the motor housing on the opposite of the lens side of the circuit board.