HP Pavilion 13-P110NR Keyboard Replacement
ID: 103080
Description: Replace your defective keyboard and restore the...
Steps:
- Remove the two rubber feet closest to the black hinge.
- Remove two 6.0 mm Philips #00 screws from the back casing.
- Remove four 5.0 mm Philips #00 screws from the back casing.
- On the silver metal brace, remove the four 6.0 mm Phillips #00 screws.
- Lift the metal brace and remove it from the device.
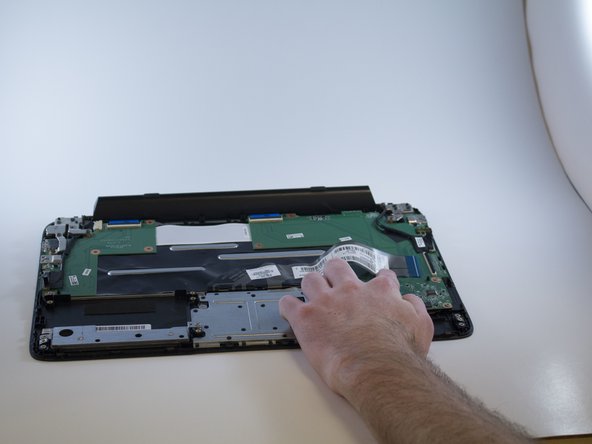
- Unflip the lock on the wire tape and lift that end of the tape away.
- Do the same for the small white piece of tape on the circuit board.
- Remove the eight 6.0 mm Philips #00 screws from the two silver holds.
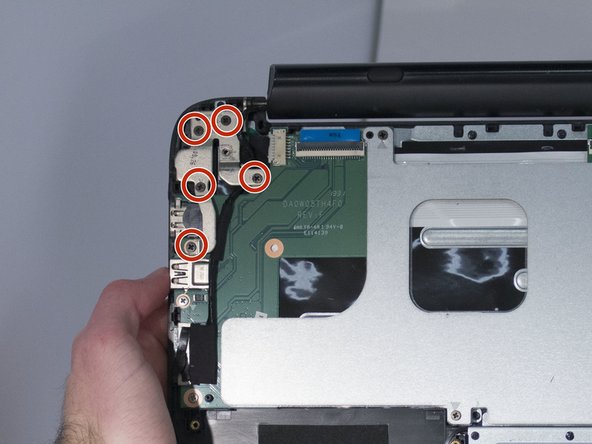
- Remove five 5.0 mm Philips #00 screws from the green circuit boards.
- Lift the white pieces up.
- Once lifted, peel the black film away to reveal a metal plate with many black glue pieces.
- Using the spudger, pry each glue piece off of the metal brace. All glue pieces must be removed.
- Use caution, the pieces may fly when they are forced out.
- Remove the metal plate to reveal the keyboard.
- Remove the keyboard from the device.