Asus ROG G751JL-DS71 Monitor Replacement
ID: 103343
Description: This guide demonstrates the step-by-step...
Steps:
- Lift the rubber cover found on the bottom of the laptop.
- Remove the 5.2 mm screw with a Phillips 1 Screwdriver.
- Use the nylon spudger to remove the back center panel.
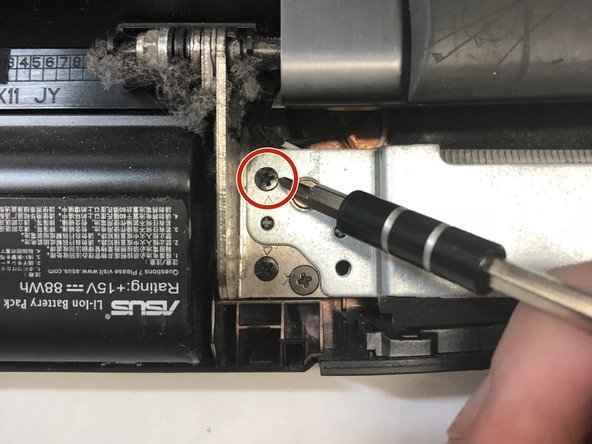
- Use a Phillips 1 Screwdriver to remove the 5 mm screw that is located underneath the back panel.
- Pull out the optical drive found on the side of the laptop.
- Use a pair of tweezers to remove the top four rubber stoppers found on the bottom of the laptop.
- Use a Phillips 1 Screwdriver to remove the top four 8.5 mm screws.
- Use a nylon spudger to carefully pry the top back panel off.
- While removing the top back panel, be careful not to break the four pin connector located underneath.
- Disconnect the four-pin connector and remove the top back panel from the computer.
- Use a Phillips 1 Screwdriver to remove the four 6.8 mm screws underneath the back panel.
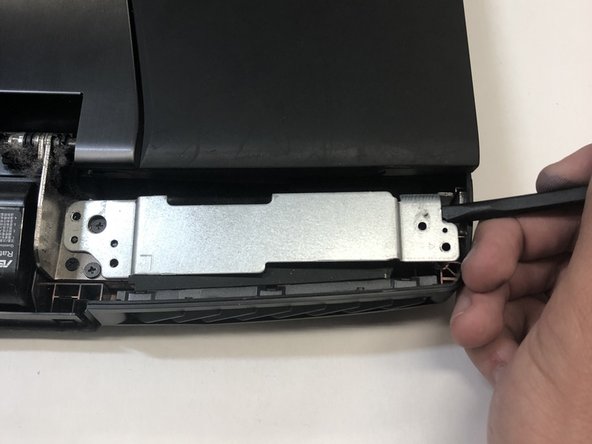
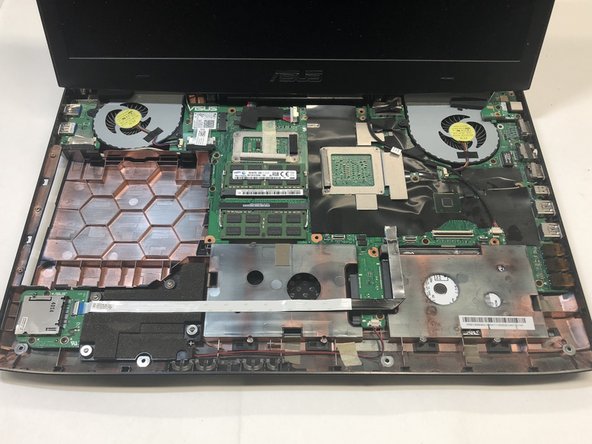
- Lift away the metal housings from each side of the laptop.
- Use a Phillips 1 Screwdriver to remove the ten 5.2 mm screws holding the main panel in place.
- Use a Phillips 1 Screwdriver to remove the four 5.2 mm screws underneath the center panel.
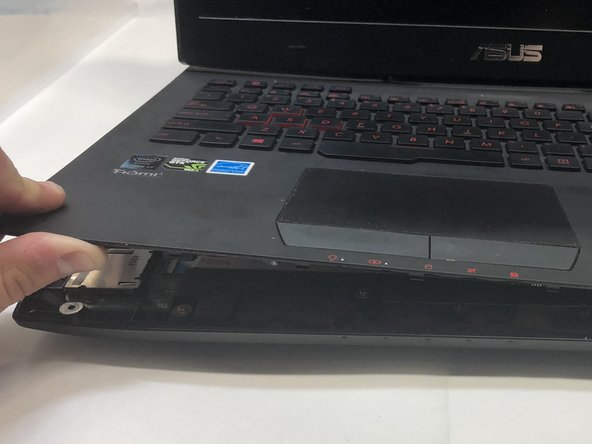
- Use a plastic opening tool to pry the keyboard from the base of the laptop.
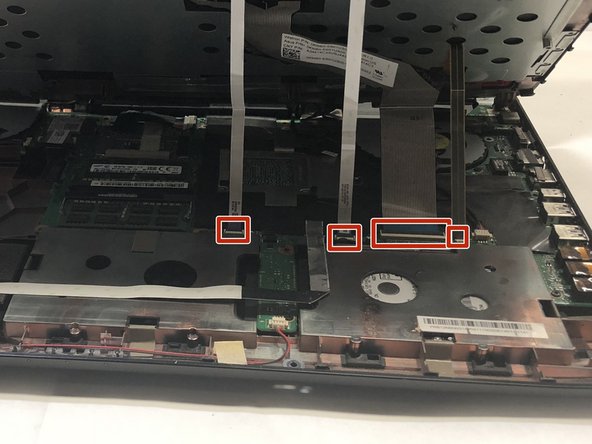
- Lift the keyboard carefully so as to not tear or break the four ribbon connectors underneath the keyboard.
- Use a pair of tweezers to undo each of the four ribbon connectors.
- The keyboard is now completely disconnected from the laptop and you can remove it.
- Use a pair of tweezers to carefully disconnect the pin connector.
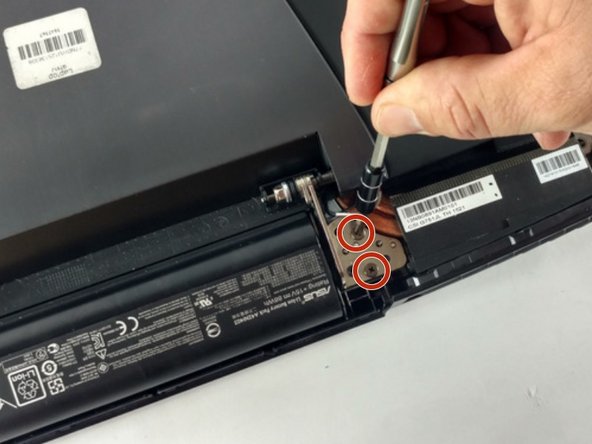
- Use a Phillips 1 Screwdriver to remove the final four remaining 6.8 mm screws located underneath the back panel.
- The monitor is now free to be completely lifted off the laptop.