Panasonic Lumix DMC-ZS6 Flash Assembly Replacement
ID: 105104
Description: This guide will teach you step by step on how...
Steps:
- Remove the battery and the SD card.
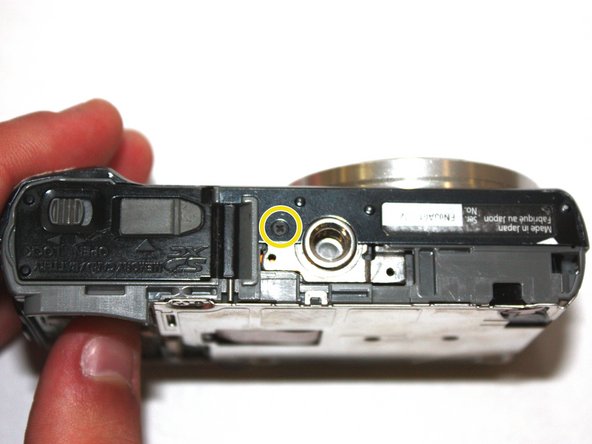
- Unscrew the two 1.0 mm screws on the bottom with a Phillips #000 screwdriver.
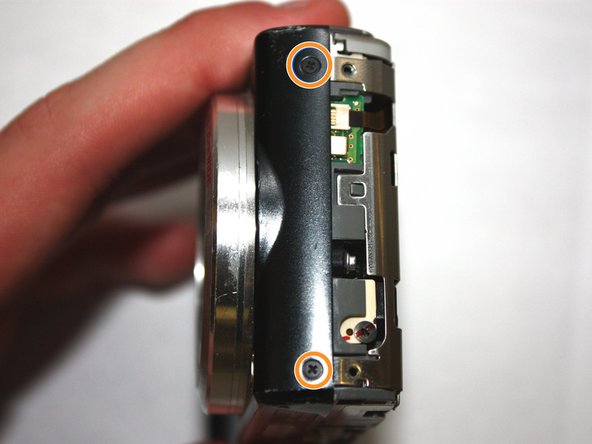
- Unscrew the two 1.0 mm screws to the left with a Phillips #000 screwdriver.
- Unscrew the two 1.0 mm screws to the right with a Phillips #000 screwdriver.
- Separate the back of the camera from the main body carefully.
- Do not apply excessive force. The LCD is connected by ribbon cables that can be easily damaged.
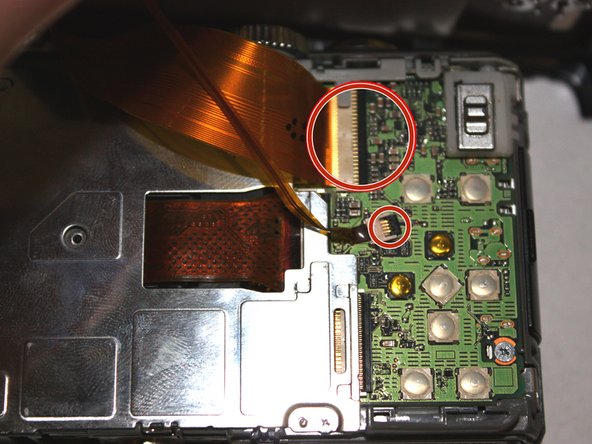
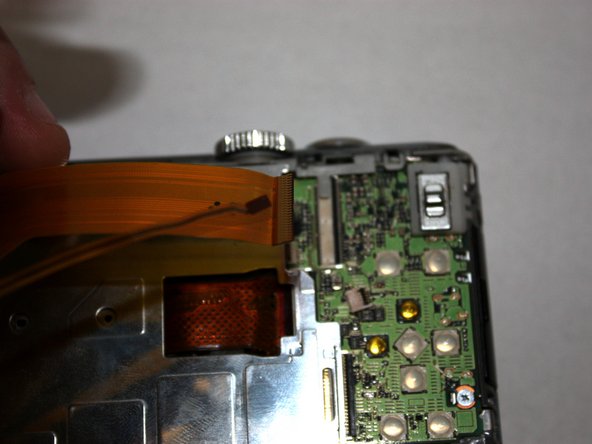
- Use the tip of the spudger to flip up the black tabs on the ribbon cables.
- Pull gently on the ribbon cables to unseat them.
- Unscrew the 1.0 mm screws to the left with Phillips #000 screwdriver.
- Unscrew the 1.0 mm screws to the right with Phillips #000 screwdriver.
- Unscrew the one bottom 1.0 mm screw with a Phillips #000 screwdriver.
- Separate the front of the camera from the main body carefully.
- Use the tip of the spudger to disengage the plastic tab.
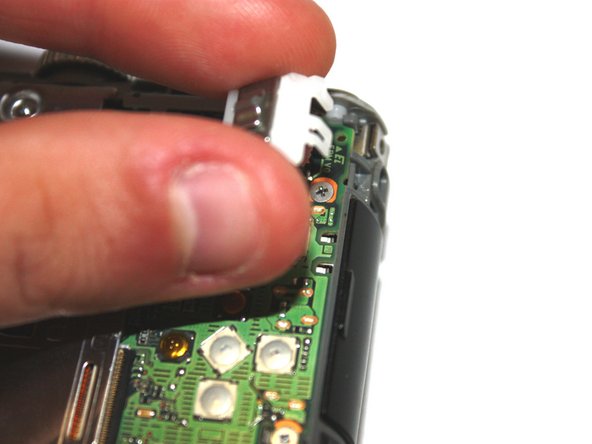
- Lift the selector switch away from the motherboard carefully.
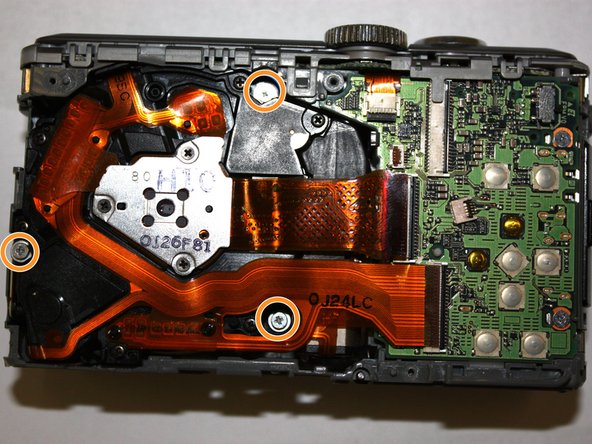
- Unscrew the three silver 1.0 mm screws with a Phillips #000 screwdriver.
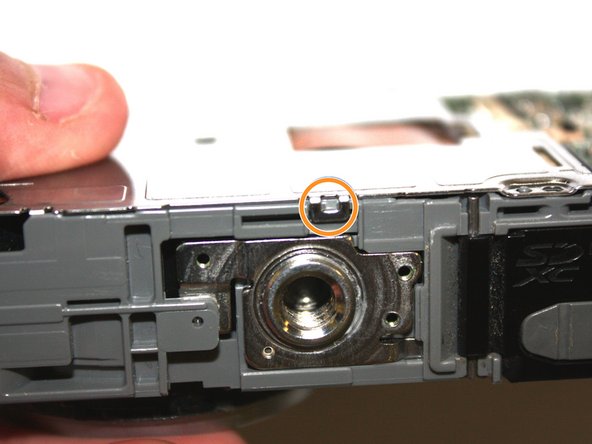
- Use the tip of the spudger to disengage the metal tab, then carefully lift the shield away from the motherboard.
- Insert the tip of the spudger into the center hole of the tripod mount, and apply force in the direction facing away from the button.
- Lift the tripod mount out of the camera body carefully.
- Use the spudger to flip up the brown tab on the motherboard and carefully unseat the ribbon cable.
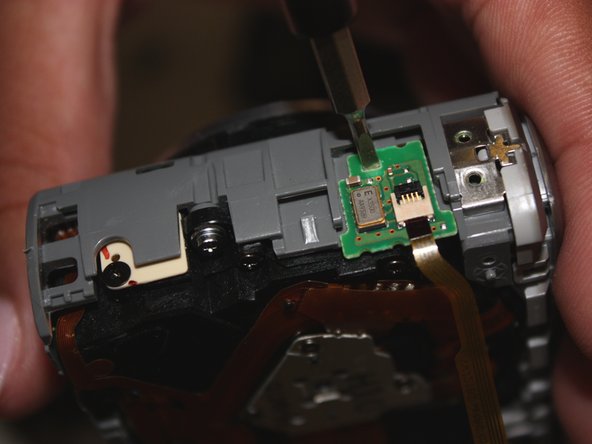
- Insert the tip of the spudger into the hole on the daughterboard, then apply upward force to remove the daughterboard from the main case.
- Use the spudger to flip up the two tabs on the motherboard and carefully unseat the ribbon cables.
- Use the Phlllips #000 screwdriver to remove the three silver 1.0 mm screws.
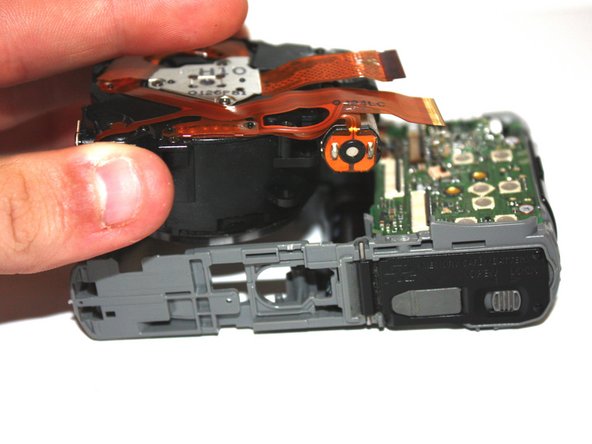
- Lift the lens assembly out of the camera carefully.
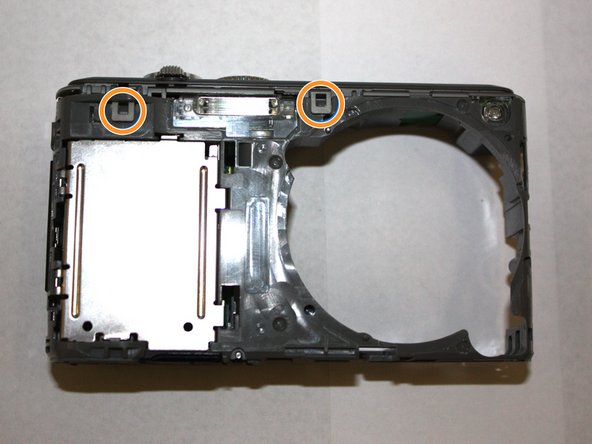
- Use the tip of the spudger to disengage the tab on the back of the camera.
- Use the tip of the spudger to disengage the two tabs on the front of the camera.
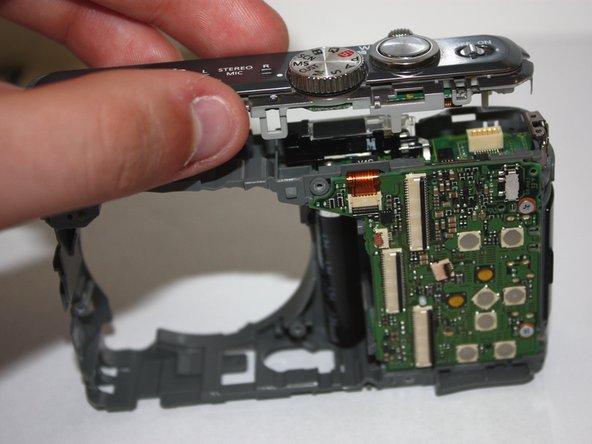
- Lift the top assembly out of place carefully.
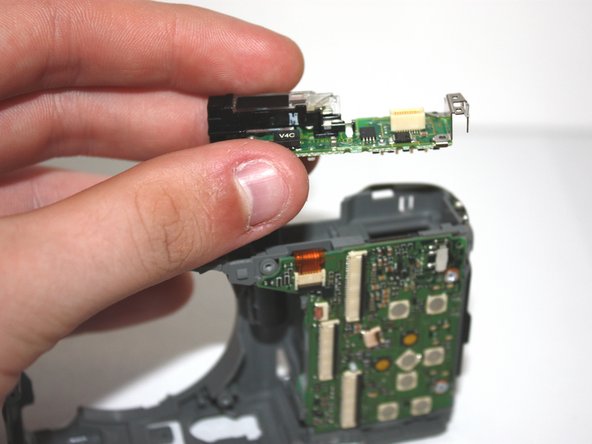
- Use the spudger to disengage the two tabs.
- Lift the flash assembly out of place carefully.