Lenovo ThinkPad Yoga 260 Repair Battery Replacement
ID: 105266
Description: If your battery is not functioning properly,...
Steps:
- Ensure the device is off and unplugged.
- Remove the stylus from its port and set aside.
- Using a Phillips #1 screwdriver, gently unscrew the eight 1.3 mm Phillips #1 screws until you hear an audible click.
- The screws will not separate from the bottom cover when loose.
- The bottom cover is attached via several plastic clips located around the edges of the bottom cover.
- Using a plastic opening tool, gently pry the bottom cover from the laptop.
- Work the plastic opening tool around the edges of the bottom cover undoing all of the plastic clips, as shown in the picture.
- Place your fingers around the edges of the cover and remove it.
- Fold back the plastic cover to access the battery connection.
- Remove the battery connection using your two index fingers.
- Gently separate the connectors.
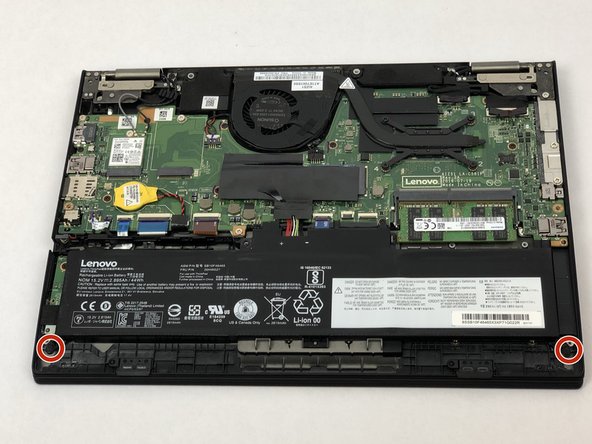
- Unscrew the two 1.3 mm Phillips #1 fasteners using a Phillips #1 screwdriver and set them aside.
- Lift the battery free from its mounting and remove it.