Dell Inspiron 1501 Wireless Mini-Card Replacement
ID: 106671
Description: This guide will teach you how to replace the...
Steps:
- Place the laptop facedown with the battery facing you.
- Push the switch above the battery to the right and hold it in that position.
- Lift the battery using the grip on the top and remove it from its socket.
- Open the laptop all the way, rotating the display so that it is level with the surface that you are working on.
- Insert the spudger underneath the groove on the right side of the hinge cover.
- Push up to pry the edge of the hinge cover out.
- Lift up to release the hinge cover from the laptop, working from right to left.
- Remove the two 5mm JIS #1 screws from the top of the keyboard.
- Lift the top of the keyboard up and pull the keyboard away from the laptop.
- Be sure not to break the ribbon connector that attaches the keyboard to the laptop.
- Open the latch holding the ribbon from the top
- Remove the keyboard from the laptop.
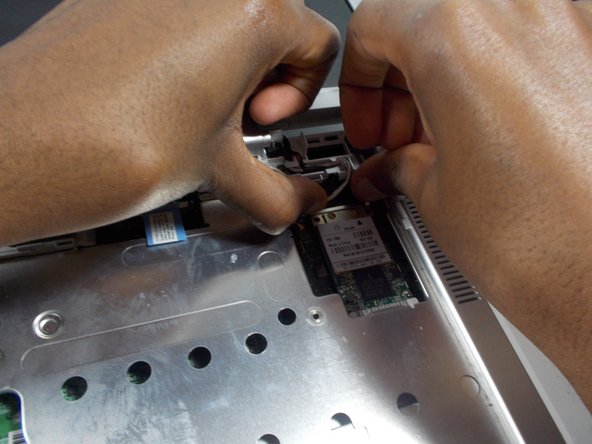
- Remove the two wires from their connections.
- Pull the metal tabs securing the wireless mini-card to the back of the laptop until the card pops up.
- Remove the wireless mini-card from the laptop.