HP Compaq Presario V5303NR Keyboard Replacement
ID: 106867
Description: This guide will walk you through the steps...
Steps:
- Turn laptop bottom-side up.
- Push the battery latch to the left position to unlock the battery.
- Lift the battery out of its socket.
- Failure to unplug the computer and remove the battery can result in electrical discharges on contact with the computer's components. This can damage the computer or even hurt the user.
- Remove the 5 mm and 4 mm screws shown, represented in red and orange, respectively, using a Phillips #0 Screwdriver.
- Keep all different types of screw separate from one another; they are different sizes, and cannot fit into the other's spaces upon reassembly.
- Turn the laptop right-side up.
- Carefully open the laptop as far as it can.
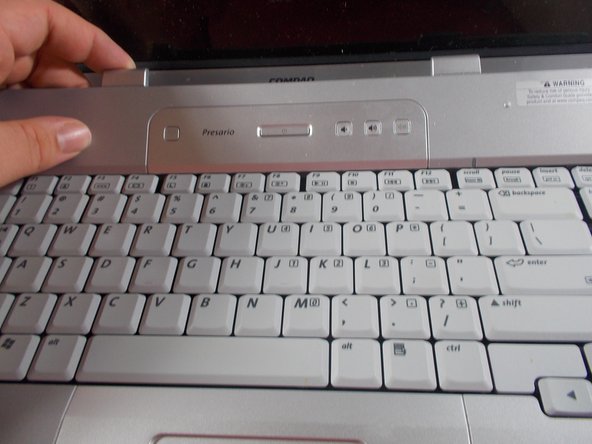
- Insert the metal spudger in the space between the switch cover and the F1, F5, F11 and Insert keys.
- Use the spudger to carefully pry the cover plate away from the keyboard and laptop at the aforementioned locations. Remove the cover plate.
- If it is possible to do so, it is advised to use a plastic spudger instead of a metal one. The metal spudger can damage the computer's internal components, but the plastic one may be too thick to fit in the gap.
- Use a Phillips #0 Screwdriver to remove the 4 4mm screws shown in the second picture. As per before, keep them separated from the screws removed in step 2.
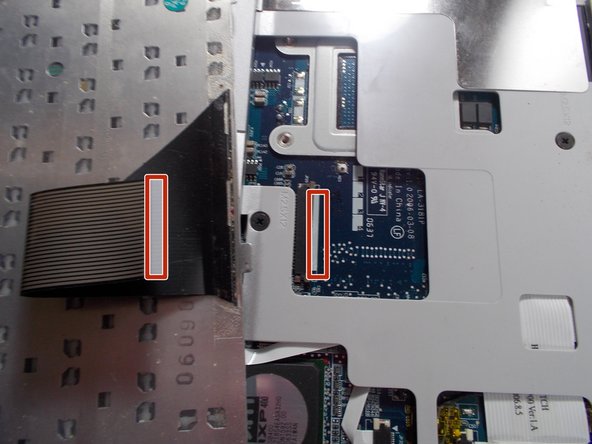
- Carefully lift up the section of the keyboard closest to the screen. Slowly rotate it downwards until it is resting on top of the touch pad.
- Using your fingers, carefully pull the ribbon cable connecting the keyboard and laptop toward the hinge. Continue until connecting cable is unplugged.
- Remove keyboard from laptop.