Dell Inspiron 17R-N7110 DC Power Jack Replacement
ID: 108445
Description: This guide will walk you through removing and...
Steps:
- Do not touch any electronic components without wearing the anti-static wrist strap. Failure to do so poses a risk of static electric shock, and may cause damage to components.
- Place the laptop on a flat surface with the Dell logo upside down.
- Flip the laptop over. The battery will be in the top center.
- Slide both the left lock and right lock, towards the center of the battery.
- Push upwards on the grip on the bottom of the battery to remove it.
- Do not pull the keyboard away from the laptop. The keyboard is connected to the motherboard by a cable. Pulling the keyboard may cause damage to the keyboard and/or motherboard.
- Metal spudgers and similar prying tools can damage internal components like the motherboard. It is ideal to use a regular black nylon spudger or a plastic opening tool, but for this device the metal jimmy was the only tool to work.
- Flip over and open your device. Gently wedge the metal Jimmy into the rightmost hole at a 45-degree angle. Make sure that the Jimmy is between the silver metal portion of the keyboard and the silver plastic edge around the keyboard.
- Tilt the metal jimmy away from you to pry up the edge of the keyboard.
- Repeat the previous actions on each of the other three holes to release the keyboard.
- Gently flip the keyboard over and lay it on the touchpad area.
- Flip up the black flap where the keyboard cable connects to the motherboard
- Gently pull the cable away from the slot to release the keyboard.
- Remove the keyboard from the device.
- Use a Phillips #0 screwdriver to unscrew the 5mm screws from the bottom. There are a total of 15 screws.
- Flip the laptop over.
- Use a Phillips #0 screwdriver to unscrew the four 5mm screws from the palmrest.
- Flip up the black flap over the first cable.
- Gently pull the cable away from the tab to remove it.
- Repeat for the other two cables pictured.
- Do not proceed without holding the laptop screen/lid for support. The screen is very heavy and may cause the device to fall if not held and supported.
- Use a plastic opening tool to pry up the edges of the palmrest cover.
- Gently lift up the palmrest cover.
- Gently pull the cooling fan cable horizontally to unplug it.
- Use a Phillips #0 screwdriver to remove the two 5mm screws from the cooling fan.
- Lift the top right corner of the fan and pull up and to the right.
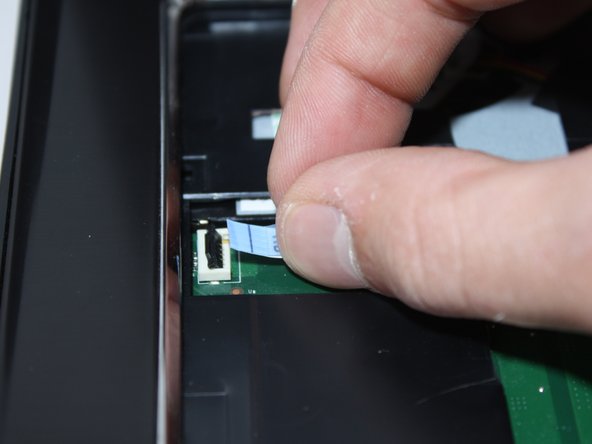
- Flip up the flap over the first cable pictured and then gently pull the cable to remove it.
- Use your finger to pull up the yellow tape and unplug the webcam cable.
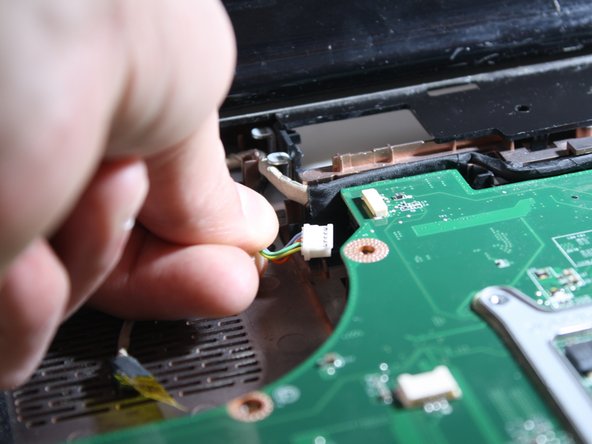
- Unplug the DC power jack cable.
- Lift the two cables with the gold ends connected to the I/O board to disconnect them.
- Use a Phillips #0 screwdriver to unscrew the two 5mm screws from the right side of the screen base.
- Use a Phillips #0 screwdriver to unscrew the two 5mm screws from the left side of the screen base.
- Gently hold the screen and pull it straight up to remove it.
- Pry the plastic backing that is under the screen upward with your fingers to remove it.
- Use a Phillips #0 screwdriver to unscrew the 5mm screw from the DC power jack base.
- Pull the DC power jack cable towards you.