Dell Inspiron 14 M4010 Display Assembly Replacement
ID: 109809
Description: In this guide, we will be showing you how to...
Steps:
- WARNING: Before working inside your computer, read the safety information that shipped with your computer. Follow the instructions in Before You Begin.
- Remove the two screws that secure the display assembly to the computer base.
- Turn the computer over and open the display as far as possible.
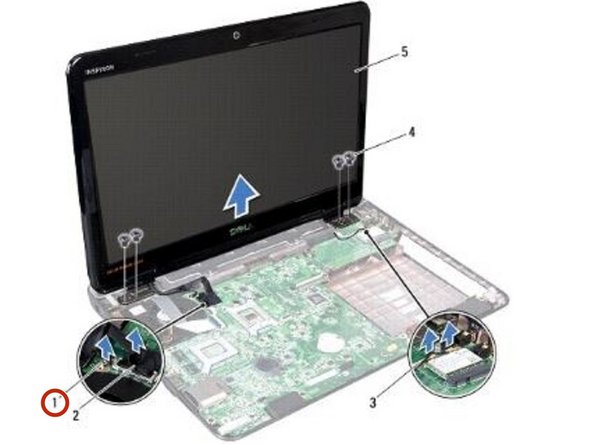
- Disconnect the display cable from the connector on the system board, and remove the display cable grounding screw.
- Make a note of the Mini-Card antenna cables and display cable routing and remove the cables from the routing guides.
- Hold the display assembly in place and remove the four screws that secure the display assembly to the computer base.
- Lift and remove the display assembly out of the computer base.
- Place the NEW display assembly in position and replace the four screws (two on each side) that secure the display assembly to the computer base.
- Route the Mini-Card antenna cables and display cable through the routing guides.
- Connect the display cable to the connector on the system board, and replace the display cable grounding screw.
- Close the display and turn the computer over.
- Replace the two screws that secure the display assembly to the computer base.
- CAUTION: Before turning on the computer, replace all screws and ensure that no stray screws remain inside the computer. Failure to do so may result in damage to the computer.