BCG600SIL Teardown
ID: 113402
Description: This is step by step tutorial on how to...
Steps:
- This is the labelled exploded view of the product. If you are unsure of the names of the part, look at the corresponding numbers.
- Start by removing the funnel by turning the knob from the lock position to the unlock position.
- Remove the knob skirt by pulling it up from the knob gamp, then remove the two screws connecting the knob connector with a Phillips screwdriver.
- Then extract the knob gamp from the bottom of the funnel by pulling it out.
- Then pull out the two funnel clips, that connect the funnel to rest of the coffee grinder in lock mode, from the bottom of the funnel.
- Remove the four screws on the base of the coffee grinder with a Philips screwdriver.
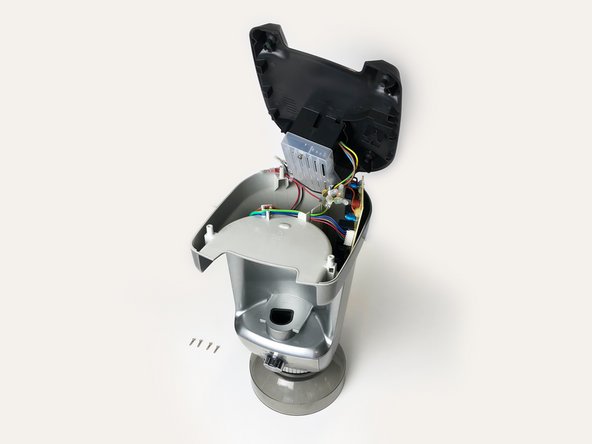
- To access the electricals and the main lead, unscrew the three screws on the cord compartment attached to the internal of the base.
- The circuit board can be reached once the base has been removed, hanging loosely inside the machine.
- A long Phillips screwdriver is needed to reach into the machine.
- Start by unscrewing the four screws that attach the metal plate, located on the end of the motor, to the plastic casing and the black plastic grinder mechanism.
- Once the motor has been removed, further unfasten the four screws and remove the corresponding washers on the base plate of the motor.
- Then, you will be able to see the mechanism.
- The plate around the timer knob is attached together with clips.
- To remove the plate from the coffee grinder, put a flathead screwdriver between the connections and use force to lever it out.
- Next, unscrew the two screws connecting the timer circuit board to the plate with a Phillips screwdriver.
- Use pliers and pull the grind control knob apart from the timer knob, as it is connected with clips.
- Remove the plastic ring insert which is attached via a pin and a spring, by pulling it apart.
- Remove the knob lid with pliers, then extract the spring inside the timer knob.
- The chrome rim around the grinder will need to be alleviated with a flathead screwdriver to unhook the clips attaching it together.
- Once the chrome rim is off, it will reveal a second white plastic rim that is secured to the grinder mechanism with three screws, unfasten these screws with a Phillips screwdriver.
- The top and middle outer casings surrounding the grinder mechanism will need to be split apart so that the mechanism can be removed. This is done with a flathead screwdriver, accompanied by a levering motion to unhook another set of clips attaching the parts together.
- When all of the parts have been separated the grinder mechanism can be accessed.
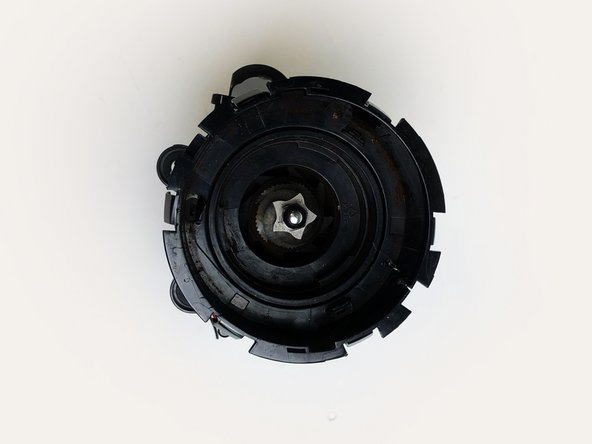
- To remove the metal burr grinder, use pliers and a steady grip to twist the hex nut off the top of the grinder in an anti-clockwise movement.
- Then, remove the two accompanying washers and the part will slide off its axle.