HP Deskjet 1055 Scanner Glass Pane Replacement
ID: 11465
Description: Without the scanner glass pane, your printer...
Steps:
- Take all paper out of the paper tray. Unplug the printer.
- Remove the plastic printer-control panel on the top left.
- Then, forcefully lift up the bottom of the panel while applying downward pressure with your thumb-as shown.
- With your other hand, slide the top of the panel towards the back of the printer.
- Do not rip the white cable that connects the panel with the main body of the printer.
- Disconnect the ribbon by pinching the blue tab and pulling away from the green circuit board.
- Lift the panel free and set to the side.
- Place the plastic opening tool between the plastic cover and the mount on the printer.
- Pry the plastic cover towards the center of the printer.
- Pull up on the cover to remove it from the printer-as shown.
- Repeat the process on the other side.
- To remove the glass panel, take out the four 14 mm (1/2 inch) screws with a T10 Torx screwdriver.
- Don't lift the glass panel completely off because there are cables plugged into the underside.
- Disconnect the white cables from the green motherboard by pinching the cable where it connects to the green motherboard. Pull up, lightly.
- Set the lower part of the printer aside.
- Place the glass panel, face down, on a smooth surface.
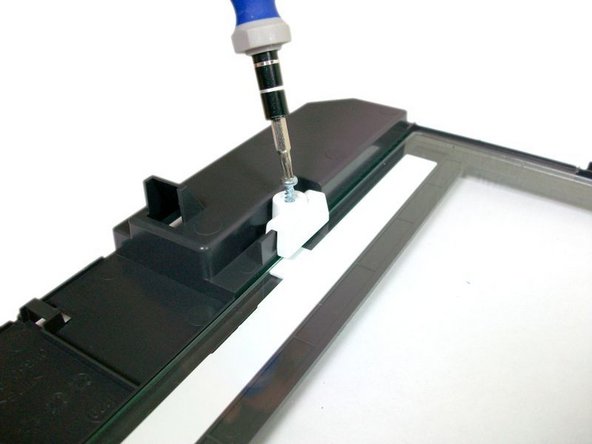
- Remove the 14 mm (1/2 in.) screw from the white plastic tab on the side of the panel with a T10 Torx screwdriver.
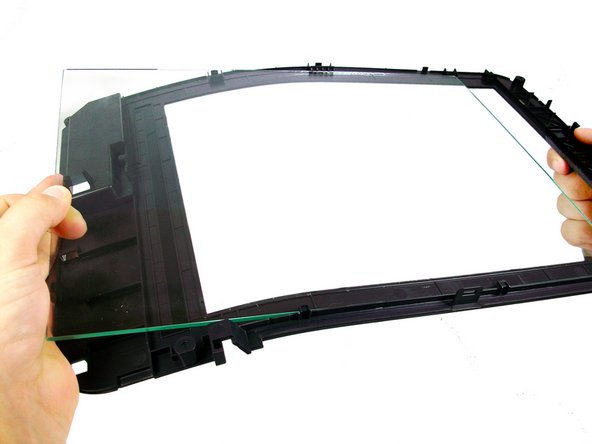
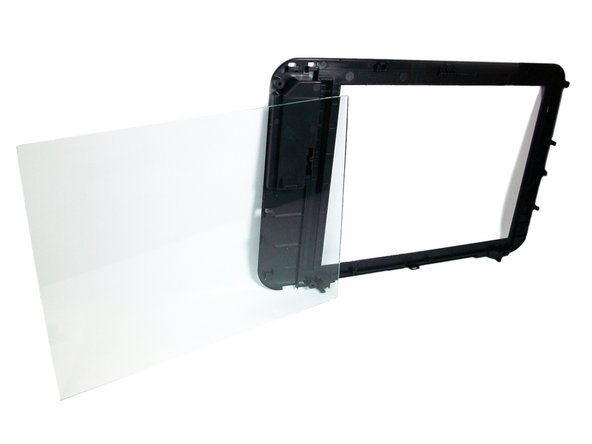
- Remove the glass pane by carefully bending the plastic frame down from the side and sliding the glass pane out from the side.