Casio CTK-501 LCD Screen Replacement
ID: 11504
Description: At some point during the use of your Casio...
Steps:
- Flip the keyboard over so that the bottom is facing up.
- Remove the twenty-seven 12 mm screws from the dark-grey panel using a Phillips #2 screwdriver.
- Remove the bottom panel by lifting and pulling it towards yourself.
- Flip open the top half of the keyboard.
- Set the keyboard onto the bottom half with the internal parts facing up.
- Be careful not to let the bottom drop.
- Completely unscrew and remove all six of the screws on the central circuit board.
- Lift the circuit board out of your way.
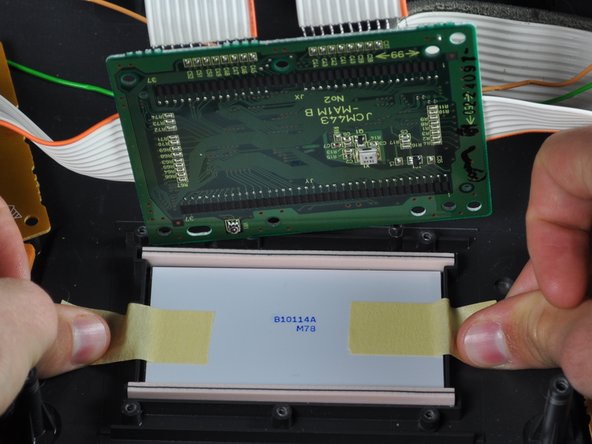
- Remove tape from the LCD screen and remove the screen completely.
- Replace the LCD screen and tape it down to the top cover.
- Place the circuit board back on top of the LCD screen.
- Screw all of the screws completely in their original positions.