Dell Inspiron 5758 DC Jack Replacement
ID: 115365
Description: This guide is to replace the DC Jack in a Dell...
Steps:
- Flip the laptop with the serial number facing up. You should be able to see the battery release switch.
- Slide the battery release switch towards the unlock icon.
- You should hear a click.
- Lift and pull the ejected battery to remove it.
- Remove the one 3mm optical drive screw.
- Remove the two 8 mm screws.
- Pry up and remove the access door.
- Remove the one 3 mm screw.
- Remove the bracket.
- Unplug the antenna cables.
- Remove the Wireless Card.
- Unplug the hard drive cable.
- Use a plastic opening tool or your fingernail to pop the tab of the cable connector. Then you will be able to disconnect the cable.
- Remove the four 8 mm screws.
- Remove the hard drive.
- Remove the two 3 mm screws under the battery.
- Remove the three 2 mm wafer screws under the optical drive.
- Remove the ten 8 mm base screws.
- Unplug the speaker cable by sliding to the right.
- Press in the tabs to loosen the keyboard.
- Carefully lift the keyboard up and turn it over.
- Unplug the keyboard cable & remove the keyboard.
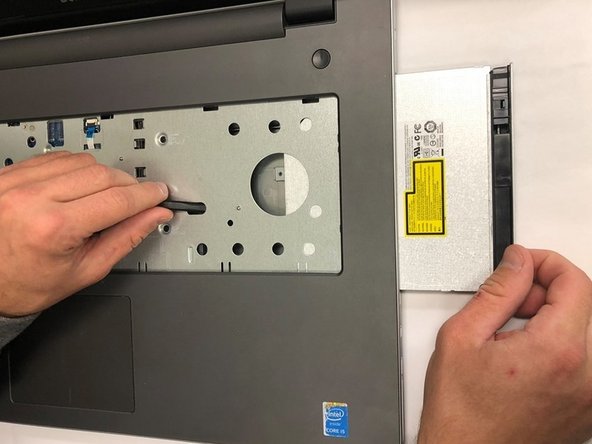
- Slide the DVD optical drive over & remove it from the laptop.
- Remove the four 5 mm screws.
- Unplug the optical drive interposer cable.
- Unplug the power button cable.
- Unplug the touchpad cable.
- Carefully pry off & loosen the bottom base.
- Remove the bottom base.
- Remove the one 5mm screw.
- Lift the circuit board & turn it over.
- Unplug the cable.
- Remove the audio/USB circuit board.
- Loosen the audio / USB cable.
- Remove the one 3mm motherboard screw.
- Lift the motherboard & carefully move it out of the way.
- Unplug the DC jack cable.
- Remove the one 3mm screw.
- Remove the DC Jack.