Hydration Bladder Leak Repair
ID: 115575
Description: Hydration backpacks are becoming increasingly...
Steps:
- Remove the hydration bladder from inside the backpack.
- Check the bladder and pipe to locate any scratches or leaks.
- It may help to fill the bladder up with water to check for additional tiny leaks which could be harder to locate than leaks on the pipe.
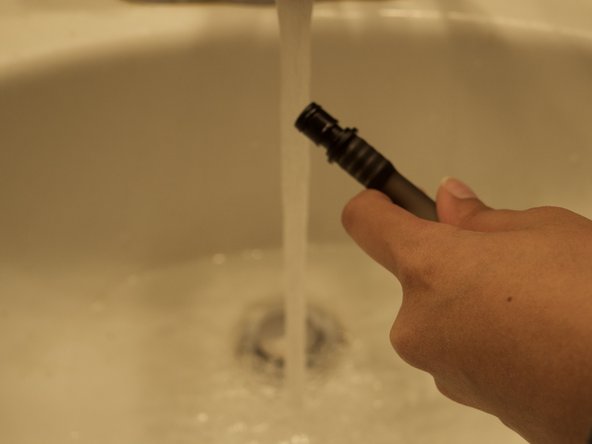
- Rinse out the pipe to clear any clogs.
- Cut appropriate size tenacious tape to patch the leak on the bladder.
- Seal the leak on the bladder with tenacious tape.
- Do not try to use regular tape as it will not seal correctly.
- Smooth out all the edges and apply pressure for approximately one to two minutes.
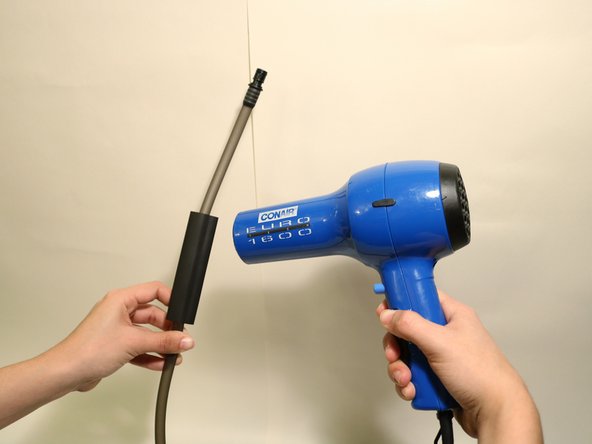
- Slide the heat shrink tube over the pipe and hold tightly in place over the ruptured area.
- Using a hair dryer, apply heat to shrink the tube until it is tightly sealed in place.
- This process may take 20-35 minutes depending on the power of your heat source.
- Reinsert the pipe back into the bladder and twist lock it back into place as shown.
- Make sure you feel it snap back into place and listen for a "click" sound.
- Slide the bladder itself back into backpack and pull the pipe out through the opening as indicated and your bag is good to go!