LeapFrog LeapPad Ultimate Motherboard Replacement
ID: 115603
Description: To replace the battery is a mild task to get to...
Steps:
- Flip over the Pad to its back side to begin the removal of the back panel.
- Begin by removing the blue rim along the edge of the device. It runs along the green silicone lining.
- This is very difficult to remove , so do be patient. To help remove the seal, both a metal spudger and plastic opening tool may be used.
- Remove the pen from its place before starting to avoid tangling.
- Once the blue rim is removed, the 12 screws will be visible.
- Use the Phillips #1 screwdriver to unscrew all 12 screws.
- Begin with the removal of the battery from its place.
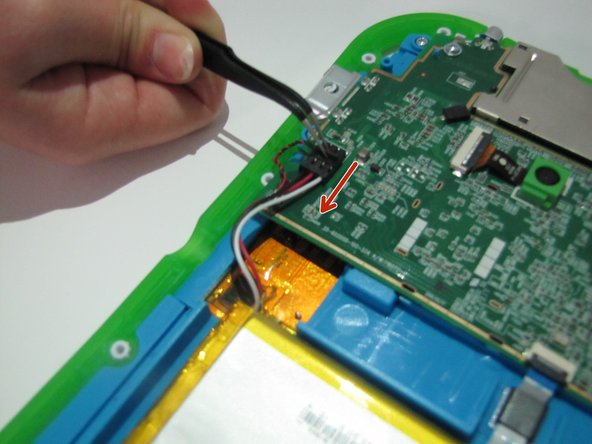
- Flip the black switch that is connecting the battery to the motherboard.
- Then pull gently and should disconnect.
- Remove the black and white ribbon structures from the side of the motherboard.
- Next, remove the three screws along the corners of the motherboard using the Phillips # 1 screwdriver.
- Use a Phillips #1 screwdriver to unscrew the 7 screws from the speaker with the bronze plate sound board.
- Unscrew the 8 screws from the blue sub-panel.
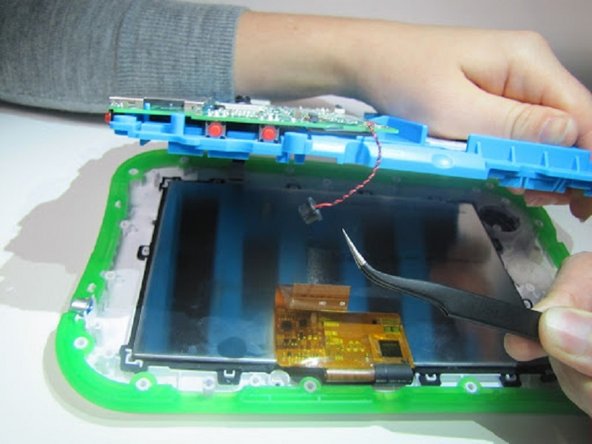
- Take off the sub-panel exposing the motherboard.
- Flip the motherboard on its back side and flip the switch to remove the wide orange ribbon and pull the twisted black and white wires from its place.