ASUS Q400A-BHI7N03 Power Jack Replacement
ID: 115635
Description: It is a common issue among ASUS Q400A laptops...
Steps:
- Flip laptop over with the battery facing toward you.
- Slide both tabs with the lock/unlock symbol, near the battery on the right of the notebook, to the unlock position.
- Grab the top edge of the battery & lift upward to relieve the battery from its slot.
- Remove the one black 8mm Phillips #0 screw.
- Lift and remove the bottom cover panel using the plastic opening tool.
- Remove the four 8mm Phillips #0 screws.
- Lift and remove the drive.
- Remove the single silver 8mm Phillips #0 screw.
- Remove the three 8mm Phillips #0 screws.
- Remove the seven black 8mm Phillips #0 screws around the perimeter.
- Remove the two silver 8mm Phillips #0 screws that are under the battery.
- Flip the device right-side up and pry up the keyboard and touchpad gently using both hands.
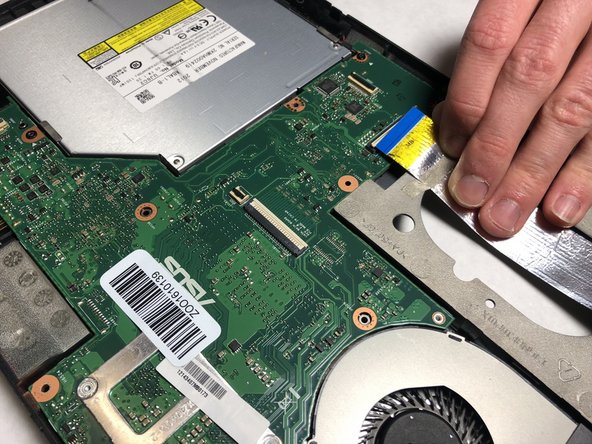
- Release the ZIF (zero insertion force) connector using a plastic spudger.
- Remove the ribbon cable by hand from the ZIF connector.
- Do not use too much force when releasing the ZIF connector.
- Remove the two remaining ribbon cables as described in Step 7.
- Unscrew the two black 8mm Phillips #0 screws.
- Firmly grasp each antenna head with a pair of blunt tweezers and detach it by lifting up straight.
- The antenna cables are connected through small sockets. Small popping sounds when attaching and detaching the antennas are normal.
- Remove the five black 8mm Phillips #0 screws.
- Firmly grab the optical drive and remove it by sliding it out.
- Lift the motherboard gently to completely remove this component from the device.
- Detach Audio Cable gently by hand and you have now access to replace the power jack.