Lenovo ThinkPad Edge E420s Keyboard Replacement
ID: 115731
Description: If you need to replace the keyboard, use this...
Steps:
- There is no external access to the battery. Please make sure the at the battery has been drained or disabled through BIOS before beginning.
- Flip the device over.
- Use a Phillips #00 screwdriver to remove one M2 x 3mm screw from the side of the device.
- Swing the cover out slightly like a hinge.
- Pull the cover directly away from the case towards the base of the laptop.
- Lift the cover up and away from the device to remove it.
- You may hear a slight pop when you pull the cover off.
- Use the clear tab to slide the hard drive out of the device.
- To replace the hard drive, remove the four M2 × 4mm wafer-headed screws on the sides of the hard drive case using a Phillips #00 screwdriver.
- Slide the old hard drive directly out.
- When reassembling, make sure the hard drive is securely in the case before beginning.
- Use a Phillips #0 screwdriver to remove eight M2 × 3 mm screws near the front opening and scattered across the bottom of the laptop.
- Remove three M2x3 mm screws using a Phillips #00 screwdriver from the base of the laptop near the opening.
- Remove the M3 x 2mm screw from the hole left by the hard drive using a Phillips #00 screwdriver.
- Flip over the device.
- Open the device normally.
- Wedge the plastic opening tool between the upper and lower halves of the lower case.
- Lift the end of the opening tool slowly until the case separates.
- Hearing a small popping or cracking noise during this step is normal
- Lift the upper half of the case up slowly.
- Be sure not to yank any of the wires connected to the case as this could damage them.
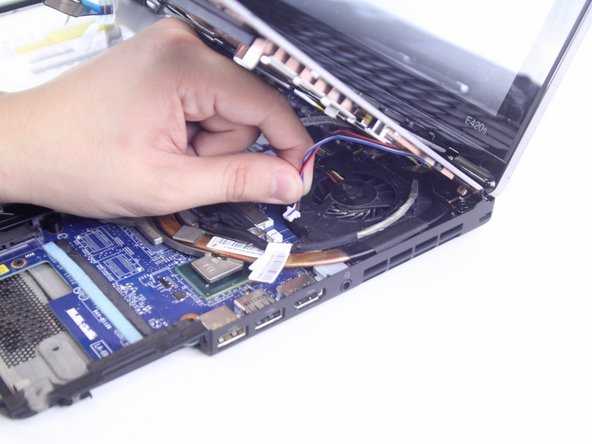
- Locate and disconnect the 4 ribbon wires from the top case.
- Locate and disconnect the two additional connecting wires.
- Some wires may be connected by a clamp. In order to remove the clamp, press upwards on the lever attached to the connector
- Be careful to not yank on the wires when disconnecting them as they are easily damaged.
- Lift the unattached case away from the device and place it to the side.
- When reassembling ensure that all parts of the case are properly aligned.
- Take the top case and turn it over so you can see the back of the keyboard.
- Use a plastic opening tool to push out the metal spacers holding the keyboard in place.
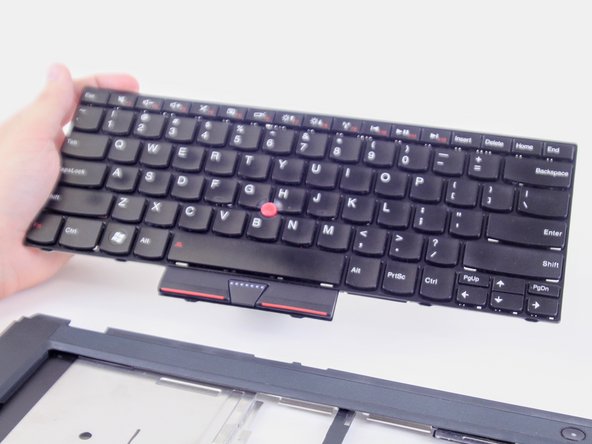
- After the metal spacers have been disconnected, the keyboard may simply fall out. If not, apply a small amount of pressure to pop it off.
- Lift the keyboard away from the rest of the case.