Acer Chromebook C730-C4V9 Keyboard Replacement
ID: 117351
Description: This guide shows the steps on how to replace a...
Steps:
- Be sure to have completely shut down the device before attempting to open it.
- Flip the device over and remove the twelve screws.
- Using a spudger slowly pry the case open by inserting the plastic opening tool at the hinges and wedging it between the Back cover and the body.
- Be careful when removing the cover off the device, a ribbon cable is connected to it
- Remove the USB Ribbon cable by opening the connector on the motherboard and sliding the cable out.
- Remove the two screws on the sides of the battery.
- Carefully slide the battery forward and the lift up
- Unplug the battery from the motherboard to prevent shortages.
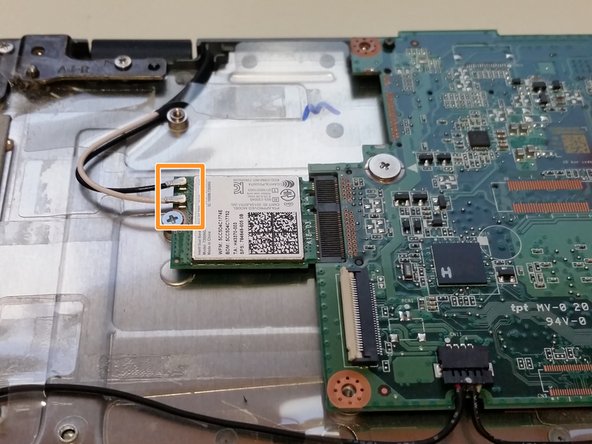
- Remove the screw from the Wi-Fi chip
- Unplug the aerials
- Remember the order of the aerials! (Generally black then white)
- Slide the chip away from the motherboard
- Remove the screen cable by using the tab and pulling up.
- Remove the track pad cable by opening the connector and sliding the cable away from the motherboard.
- Remove the keyboard cable by opening the connector and sliding it away from the motherboard.
- The speaker cable can be a bit tricky, with the assistance of the plastic opening tool, pull/pry the plug towards you (Carefully!)
- Remove the six screws from the hinges.
- Using the plastic opening tool, slide it under the right hinge and lift the hinge up so its not sitting on the motherboard.
- Remove the five screws holding the motherboard in.
- Lift the motherboard up slowly.
- Try to lift the motherboard up as straight as possible as there is solid thermal grease on the bottom.
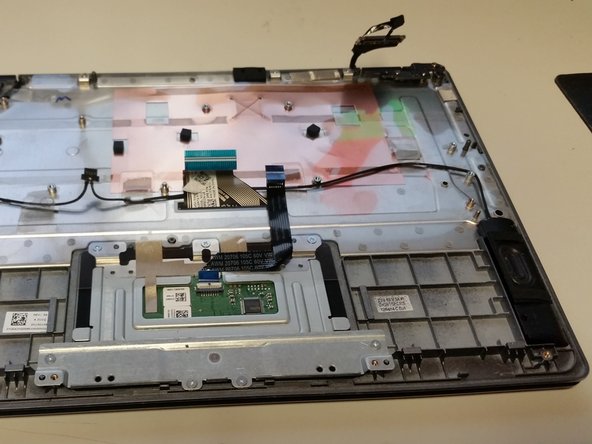
- Using the plastic opening tool, insert it under the speakers in the middle and pry them up
- The speakers are held on with double sided tape and will be glued back later. (You can use double sided tape if you wish)
- This step is optional, I do it because it makes life so much easier!! But its totally up to you.
- While holding your thumbs on the hinges to keep them in place, open the screen slowly
- Once the screen is almost flat you should feel the hinges come loose.
- Lift the screen up from the body and it should separate.
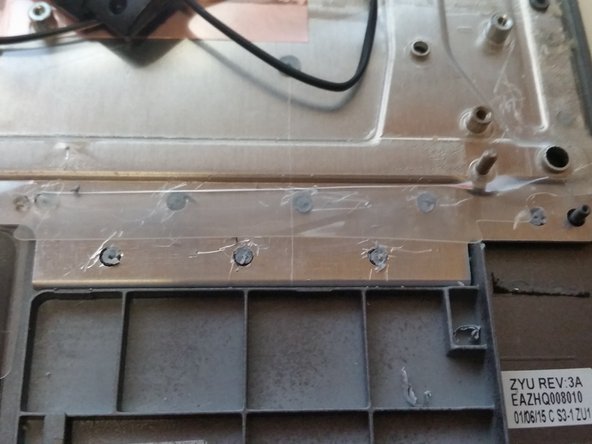
- The motherboard plate is held onto the frame by plastic pins.
- Work your way along the edges of the plate and attempt to remove the top off every single pen if possible.
- After removing as many pins as possible work your way around the plate and pry it up.
- Start working your way under the plate to disconnect it from the keyboard.
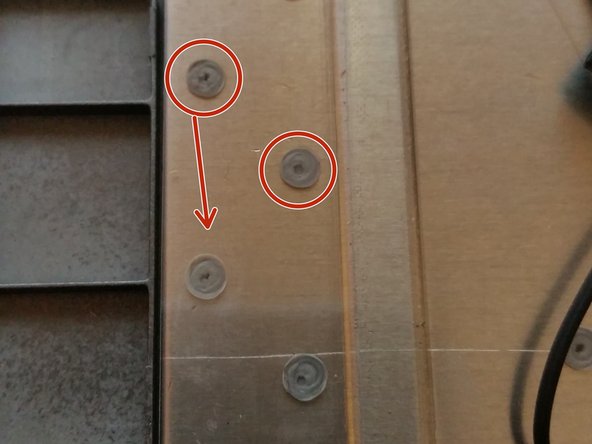
- The keyboard is held onto the frame by plastic pins.
- Work your way along the edges of the keyboard and attempt to remove the top off every single pen if possible.
- Do not cut the pins that stick out above the keyboard, these are for the motherboard plate.
- After you have removed the top off every pin, using the plastic opening tool work your way around the keyboard, it should lift right out.
- Place the new keyboard in the frame and ensure it is sitting nicely.
- Once in place, using a hot glue gun start putting small drops of glue on the pins you cut off the keyboard.
- While gluing, keep a constant pressure on the keyboard to ensure it sets while in its optimal position!
- Avoid gluing the pins that are risen! This will affect the fitment of the motherboard plate.
- Do NOT put glue in the keyboard holes that haven't got pins! These holes will leak glue underneath the keys! ONLY place glue on the keyboard pins
- Work your way around the plate putting glue on the plastic pins.
- While gluing, keep a constant pressure on the plate to ensure it sets while in its optimal position!
- Only put glue on the plastic pins you cut the tops off!
- Chose whether to use glue or double sided tape.
- Put a dab of glue at the top and bottom of the speaker (Where the old double sided tape is)
- Place speaker into position.