Acer Chromebook C720-2827 LED PCB Replacement
ID: 121915
Description: This guide will show you how to replace you...
Steps:
- Remove the thirteen 6.0mm screws on the back panel using your Phillips #1 screwdriver.
- Pry the back panel open with the plastic opening tool.
- Remove the two 6.0mm screws securing the battery with your Phillips #1 screwdriver.
- Carefully pull out the battery wire connected to the battery port.
- Slowly lift the battery to remove it from the Chromebook.
- Use the Phillips #1 screwdriver to remove the two 3.1mm screws from the LED PCB.
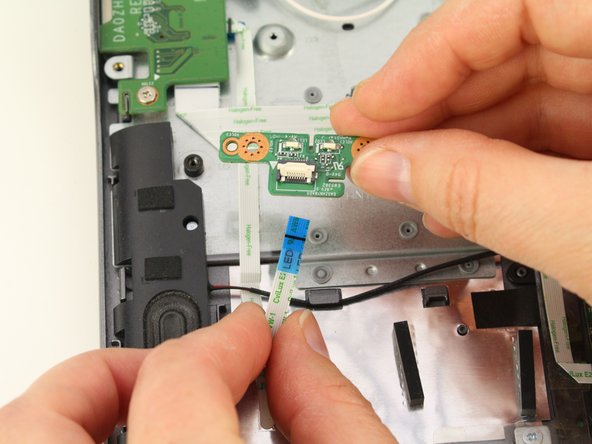
- Lift the LED PCB up with your fingers and flip it over revealing the ZIF connector.
- The LED PCB is still tethered to the daughterboard via a ribbon cable so be sure not to yank it out or it could cause damage to the cable or its connectors.
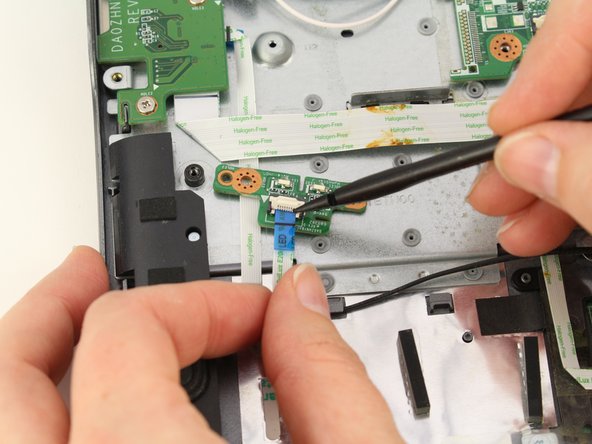
- Set the LED PCB down and use your spudger to flip up the white bar of the ZIF connector.
- Pull the ribbon cable out with your fingers.