Toshiba Satellite C55-B5302 Screen Bezel Replacement
ID: 122027
Description: These are the steps for removing the screen...
Steps:
- Flip laptop upside down so you can see the screws.
- Using the Phillips #0 screwdriver, remove the two 7 mm screws from the back casing.
- Pull the battery from the back of the laptop for removal from the laptop.
- Remove the remaining 7 mm screws on the back panel of the laptop with a Phillips #0 screwdriver.
- Use the plastic opening tool to pry up a corner of the back panel and continue to pop the back panel off.
- Expect to hear popping as you pull the back panel off.
- Disconnect the fan wire from the motherboard.
- Remove the three 3 mm screws with a Phillips #00 screwdriver.
- Remove the 5 mm screw with a Phillips #0 screwdriver.
- You can now lift the fan out of the laptop.
- After the fan has been removed, lift the hinge so as to get access to the parts below it.
- Remove the the black colored cable that is now exposed.
- Remove the 7 mm Phillips #0 screw on the other hinge.
- Remove the 3.1 mm Phillips #0 screw on the the same hinge.
- Lift the hinge up and towards you.
- Pull out the wide cable to reveal the components underneath.
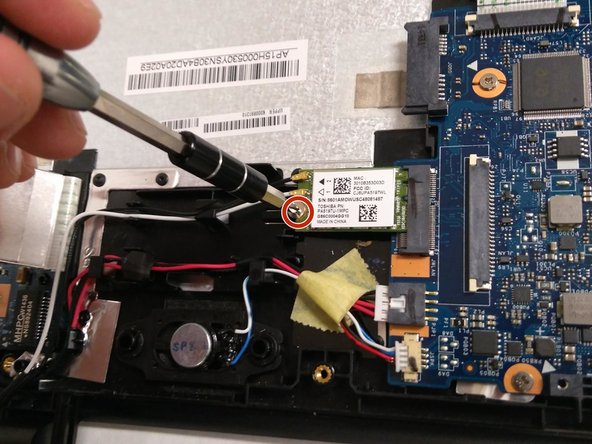
- Remove the 3.1 mm Phillips #0 screw holding the chip in place.
- Pull out the chip.
- Hold the cable that is to be removed.
- Use an iFixit opening tool to push down on the white protrusion of cable connector.
- Now you can pull out the cable.
- Pivot and lift up the monitor and separate it from the base of the laptop.
- Use an iFixit opening tool to separate the two halves of the bezel starting at both the plastic hinges.
- Use the metal spudger to separate the rest of the bezel.
- Be careful not to scratch the screen with the metal spudger.
- You may hear some sounds as the clips on the bezel disconnect from the back cover. This is normal.