Samsung ATIV Book 9 Plus Heatsink Assembly Replacement
ID: 122062
Description: Before beginning be sure you have the iFixIt...
Steps:
- Turn the laptop upside down so that the underside of the laptop is facing you.
- Use a Phillips #000 screwdriver to unscrew the 4.3 mm screws located on the edges and corners of the laptop.
- Lift the cover to reveal the interior of the laptop.
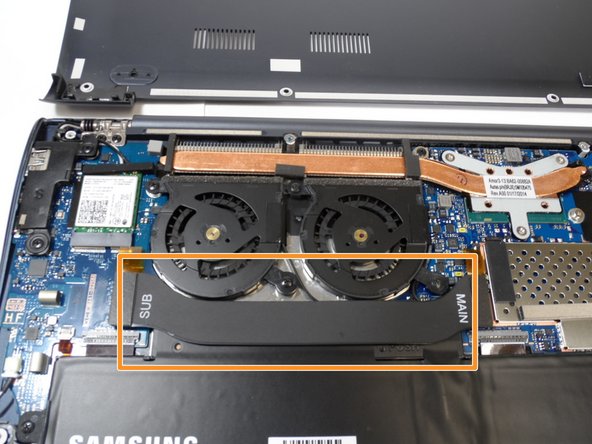
- The fans should be in the upper left corner of the laptop if the laptop is oriented with the battery in the bottom half.
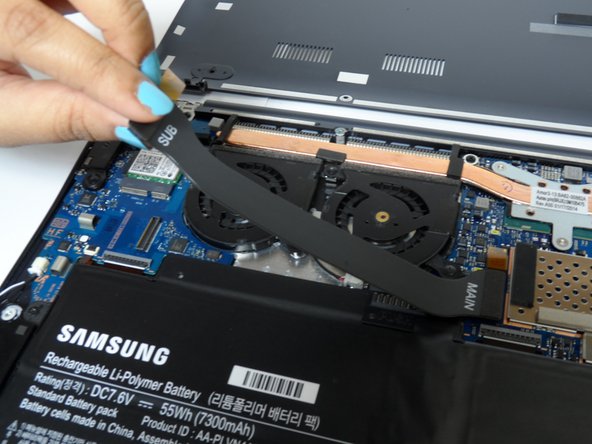
- Gently lift the fans' black connector strip out of the way.
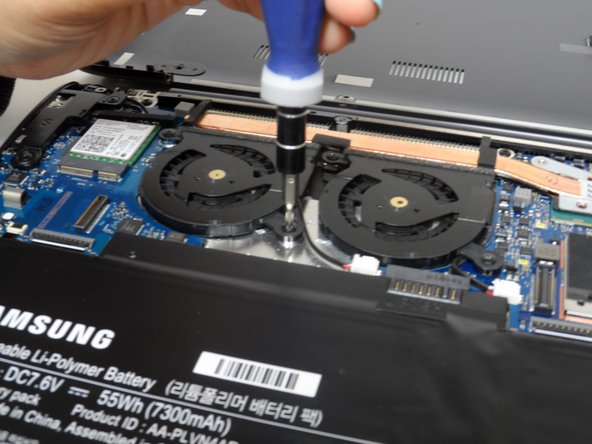
- Using a Phillips head screwdriver, unscrew four 4.55 mm Phillips #000 screws that bind the fans.
- Disconnect the white connectors by gently tugging on them.
- Lift the fans from their positions.
- Using a Phillips head screwdriver #000 unscrew the motherboard from the rest of the components.
- Disconnect the two cables shown in the picture by gently pulling them off.
- Using a Phillips #000 screwdriver, unscrew the three labeled screws to detach the heatsink assembly.