Asus ZenBook Flip UX360C Motherboard Replacement
ID: 122381
Description: This guide will assist the user in replacing...
Steps:
- Remove all ten T5 screws on the back cover near the edges.
- Remove two Phillips #1 screws located under the rubber feet near the screen.
- Use a metal spudger to gently separate the keyboard from the computer case.
- Do not completely remove the keyboard as there are two ribbon cables that connect the keyboard to the motherboard.
- Lift the keyboard slightly, and use a plastic spudger to release the two ZIF connections to free each ribbon cable.
- Remove the keyboard.
- Use the Phillips #1 screwdriver to remove all 5 mm screws.
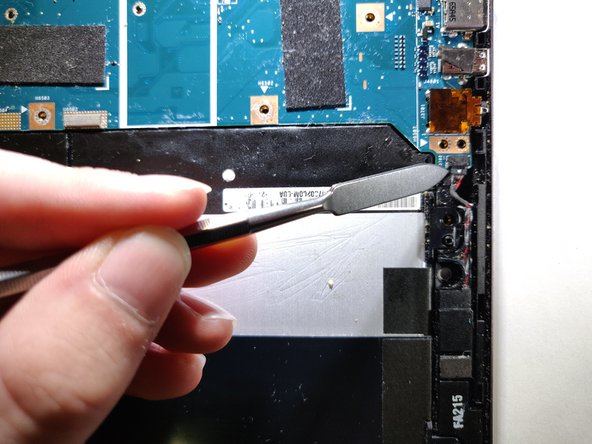
- Use a plastic opening tool or nylon spudger to lift the monitor connections off of the main board.
- Clip off the battery from the main board.
- Use of a metal spudger can cause damage to the device or harm to the user, especially near the battery! Use an ESD safe tool for this step instead.
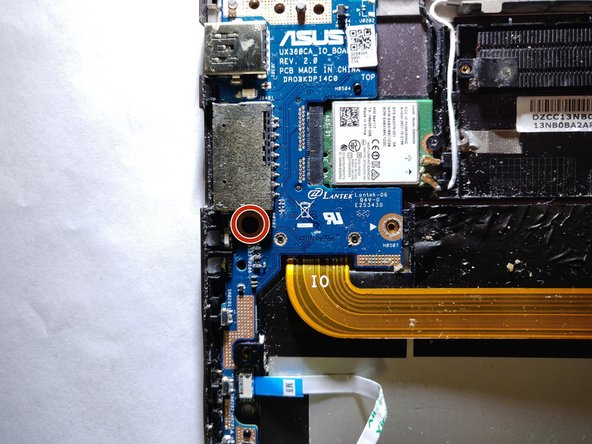
- Remove the black foam above the screw on the I/O board.
- Remove the 5 mm #1 Phillips head screw.
- Use of a metal spudger can cause damage to the device or harm to the user, especially near the battery! Use an ESD safe tool for this step instead.
- Pull the I/O board away from the chip to detach it.
- Remove the I/O board and main board.