Braven BRV-X Front Speaker Panel Replacement
ID: 122384
Description: Use this guide to remove the front speaker...
Steps:
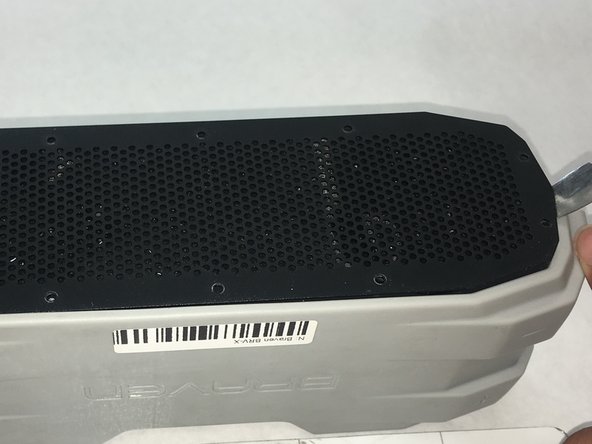
- Remove four 1.1 cm outer screws in the outer shell using the Phillips #00 screwdriver.
- Remove four 1.3 cm inner screws in the outer shell using the 1.5mm Hex screwdriver.
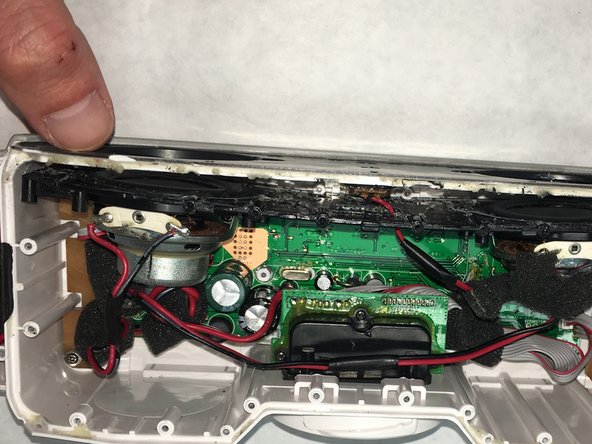
- Gently remove the outer shell.
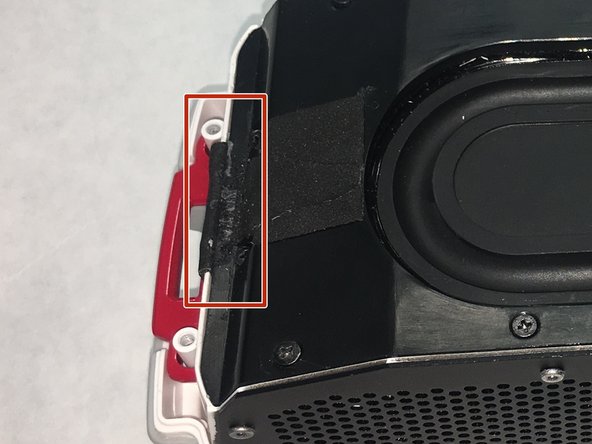
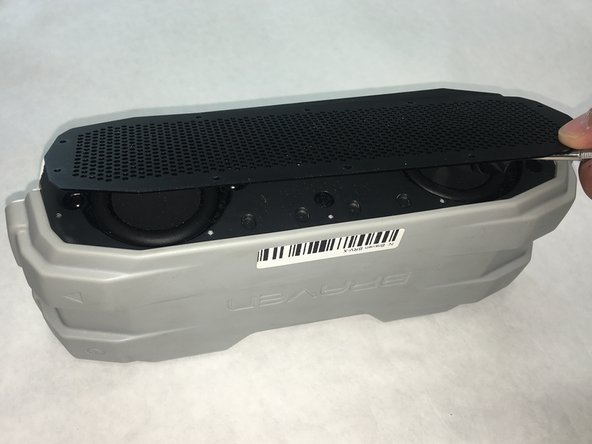
- Cut adhesive tape on both sides.
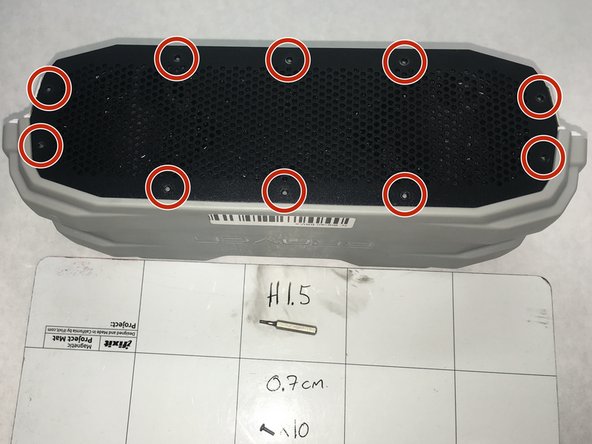
- Remove eighteen 0.9cm screws in the inner shell using the Phillips #00 screwdriver.
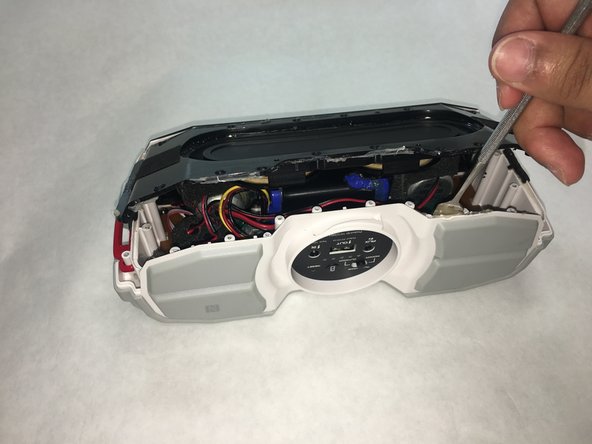
- Pry open the glued inner shell using a spudger around all sides of the shell.
- Don't use too much pressure as that could cause damage to the plastic.
- Remove ten 0.7 cm screws in the front plate using the 1.5 mm Hex screwdriver.
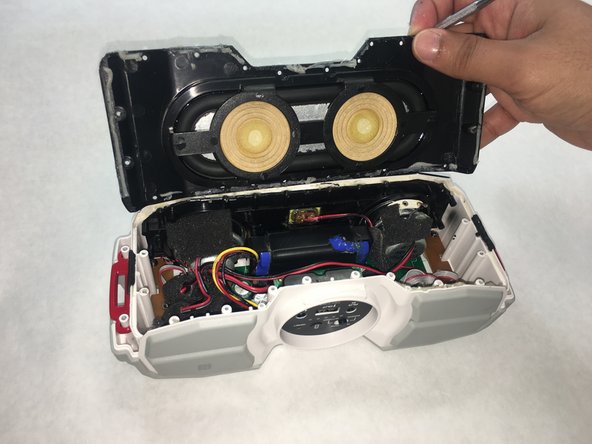
- Use a spudger to open the front speaker plate.
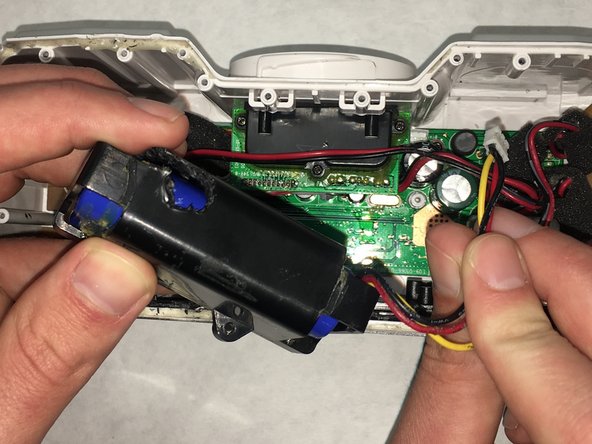
- Remove three 1.0 cm screws from the battery unit.
- It is recommended (but not required) to remove the battery.
- Disconnect the ribbon cable attached the main board.
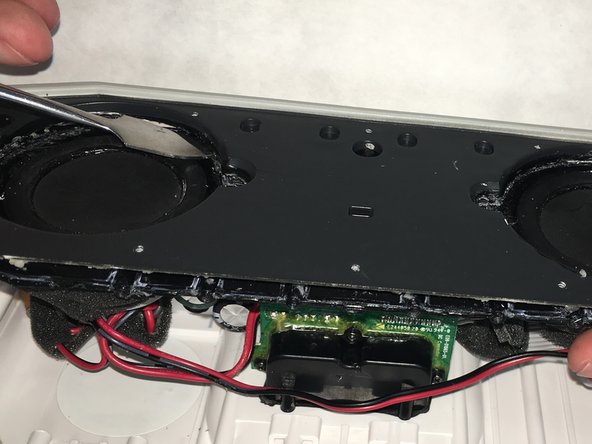
- Pry open the second plate holding in the speaker using a spudger around all sides.
- It is recommended to use a spudger to remove the heavily glued areas between the plates before prying.
- Don't use too much pressure as that could cause damage to the plastic.
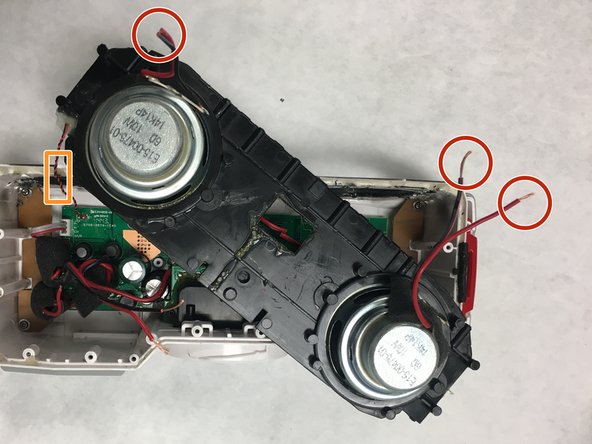
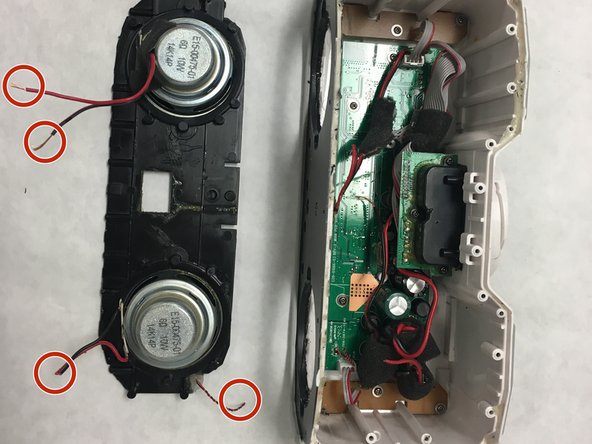
- Cut the 20 gauge wires attached to the front IR sensor and two speaker wires.
- Leave enough length on the wire to work with it afterwards.
- Cut the 22 gauge wire attached in the corner.
- Solder the new speaker plate during reassembly.
- To properly solder and desolder connections, visit the How to Solder and Desolder Connections guide.