Nikon Coolpix B700 Flash Unit Replacement
ID: 122420
Description: This guide shows how to replace the flash...
Steps:
- Use the Phillips screwdriver to remove the two 5.5 mm screws on the left side of the camera.
- Use the Phillips screwdriver to remove seven 5.5 mm screws from the bottom of the camera.
- Use the Phillips screwdriver to remove the two 5.5mm screws on the right side of the camera.
- Open the HDMI flap to remove a 5.5mm screw.
- Don't forget to replace the hidden screw under the HDMI flap during reassembly.
- Use the Phillips screwdriver to remove the two 5.5mm screws under the LCD panel.
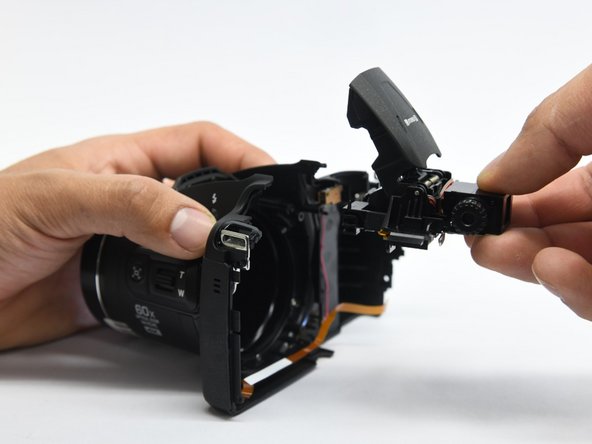
- Open the flash assembly and insert the spudger into the slot under the flash unit and twist.
- While twisting, pry apart the shell to split the camera in half.
- Be careful not to damage the ribbons that connect the halves together.
- Place the pry tool under the black latch. Lift gently until the latch flips up.
- Gently pull the ribbon away from the latch.
- Be gentle when taking ribbons out and apart because they are fragile.
- Use the Phillips screwdriver to remove the remaining five 5.55mm screws.
- Remove the single 6mm screw.
- Insert the pry tool under the latch and gently lift up to remove the ribbon.
- Move the ribbon out of the way to reveal the hidden screw.
- Lift the button assembly gently to give access to remove the 4mm screw.
- On the top of the camera, remove the 6mm screw.
- With the spudger tool gently pry off the white tap holding in the bracket.
- Use the same tool to remove the glued-on ribbon.
- Gently lift up the button assembly to slide the bracket out.
- With the pry tool gently lift up the latch and pull the cable toward the lens assembly.
- Use the pry tool again and place it under the ribbon and lift straight up to disconnect the ribbon.
- Use the Phillips screwdriver to remove the four 6 mm screw that hold on the bracket housing.
- Remove the tripod mount from it's slot.
- Now you just have to slide the lens assembly out of the housing.
- Use the metal spudger to open the latch to remove the ribbon.
- Use the Phillips screwdriver to remove the single 6 mm screw.
- Gently lift the button assembly. Slide the motherboard out from the shell.
- Desolder the black, gray, and white wires from the motherboard.
- The motherboard is labeled with the wire colors.
- Using a Phillips screwdriver, remove the two 6 mm screws that hold the flash assembly.
- Now while pushing the flash button slide out the flash assembly from the housing.
- The flash button could fall out when the assembly is removed.
- During reassembly, insert the flash unit assembly first, then reconnect the flash button.