Asus ZenFone 3 Zoom Screen Replacement
ID: 124769
Description: This guide is designed to show how to safely...
Steps:
- Use sim card attachment for the screwdriver found in the IFIXIT box to remove the sim card tray from the phone.
- Remove the 3.5 mm screws on both sides of the charging port, at the bottom of the phone, using the T2 screwdriver.
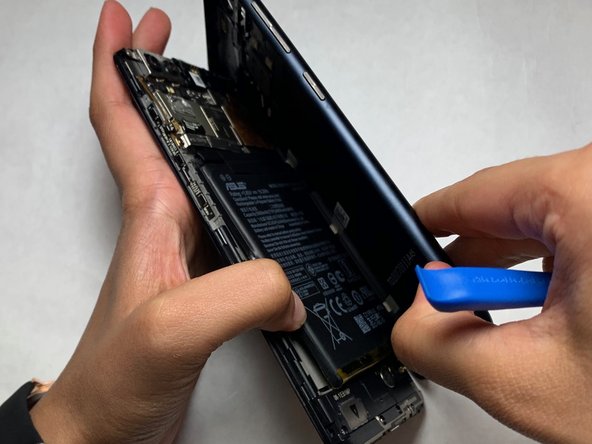
- Use the opening tool to separate the screen and the plastic body of the phone.
- Utilize the PH #00 attachment to remove the two 3.3 mm screws in the bracket to the top left of the battery.
- After removing the bracket and screws, pull up on the battery from the bottom of the unit and set aside.
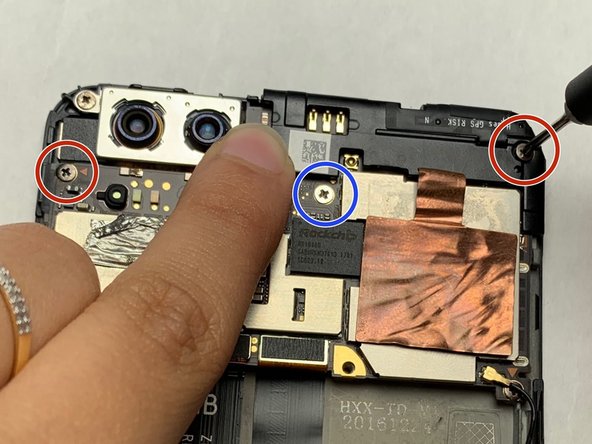
- Remove all three screws near the top of the phone with the PH #00.
- The top right and left screws are 3.25 mm.
- The middle screw is 2.65 mm.
- De-solder the single black speaker wire attached on the left side of the phone.
- Use the flat-edge side of iFixIt plastic spudger to detach both of the ribbon cables off of the motherboard at their connection point.
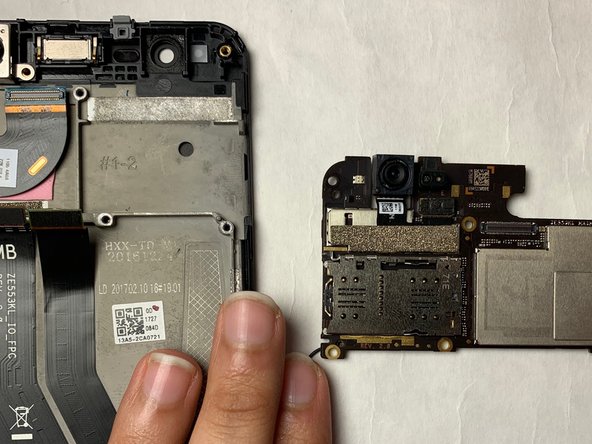
- Use the tweezers to lift up on the edges of the motherboard located above where the battery was, then remove the motherboard.
- Remove the speaker cover at the bottom of the casing by taking out all five 3.25 mm screws with the PH #00.
- Gently pry off the ribbon cable from speaker housing with the flat-edge side of the iFixit plastic spudger.
- Remove the speaker once exposed.
- Use iOpener to soften the adhesive keeping the screen on the device.
- Pry off the screen beginning at the right-hand side toward the bottom of the phone with the plastic flat-edge spudger.
- Progress around the perimeter of the phone with the pry tool till the screen is off.
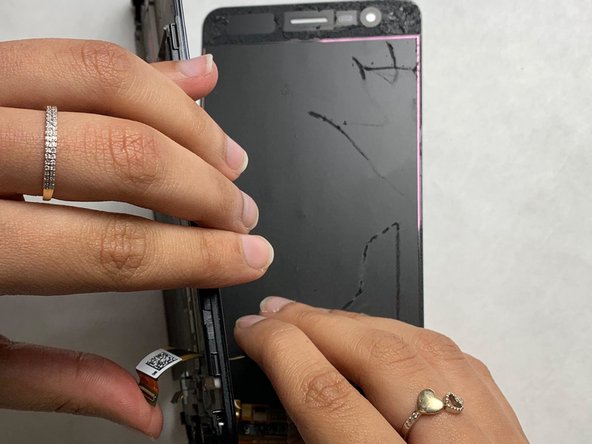
- Remove the screen by pulling the attached ribbon cable out through the exposed opening.
- The finished product will be a screen with nothing attached to the body of the phone.