BaByliss for men GPB008E T86a Battery Replacement
ID: 124897
Description: This guide documents how to replace the 2...
Steps:
- Let's go!
- Click the trimmer head off
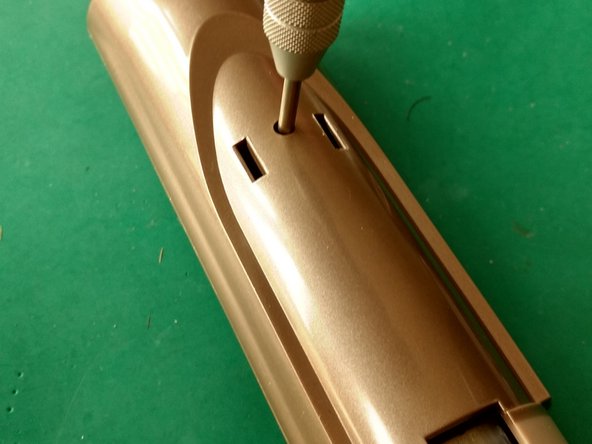
- Remove both screws inside the head (in the picture: left screw already removed)
- Gently remove the top part until you see this. Take a good look how the white insert in the head part (you just removed) is fixed because it will probably fall out at some point :)
- Now remove the black insert by sliding it up a bit
- There is another screw hiding in that tiny hole
- We're in!
- The PCB clicks out but there are slide contacts at the back, so don't be alarmed if the trimmer suddenly activates. Slide something inbetween and then put some tape on the slider to avoid further contact.
- Unscrew the motor too so we can get good access to the bottom of the PCB
- Before you start unsoldering, write the polarity down so there is no unpleasant mistake later on!!!
- There is plenty of solder, heat up one side and gently pull out the solder lip by pulling the battery. Then do the same thing at the other side.
- Make sure to keep the holes open so we can insert the new ones later on
- One extra thing to do before we can start soldering in the new batteries!
- Yes, you see that right: the solder lips of the new batteries will probably be to wide, so we cut them up a bit.
- You are handling batteries that have been charged in the factory, don't short them!
- TADA! New batteries are in
- Now for the reassembly: just reverse the steps and pay attention to this:
- First screw in the motor again
- Remove the tape that shields the contacts
- Align the PCB properly before clicking it in
- When inserting the PCB, pay attention to the LED so it is inserted into its hole or you will not be able to close the case properly
- When the PCB is in, do a quick test to make sure it runs
- When attaching the head part, make sure the white insert is mounted properly: two tiny holes go over two pins in the head so the screw holes align perfectly. Center the moving part of the insert and center the motor pin so they fit
- That's it! Congratulations on an almost new trimmer for <5 euro / dollar