ThinkPad 13 Chromebook Display Replacement
ID: 125319
Description: Use this guide to replace a broken LCD in your...
Steps:
- Before proceeding, unplug and power down your ThinkPad. Close the display and lay it on a soft surface, top-side down.
- Use a Size 0 Philips screwdriver to loosen the nine screws on the bottom of the case. They will not come out entirely, but you will feel when they are loose enough.
- You will need to remove the rubber pads from the bottom three screws using a pair of tweezers.
- Insert an opening pick into the space between the lower case and the chassis.
- Slide the opening pick around the case, pushing inward to release the clips securing the lower case. You should feel and hear the clip pop free.
- When all the clips have been released, you should be able to easily remove the lower case.
- If you feel resistance when lifting the case, ensure all the clips have been released and all the screws are adequately loosened.
- Use a spudger or other plastic tool to push the battery connector in the direction of the arrow, removing it from its socket.
- Remove the four screws securing the battery to the upper case.
- Lift the battery out of the upper case.
- Before proceeding, unplug and power down your ThinkPad. Set your computer to face you, with the screen open.
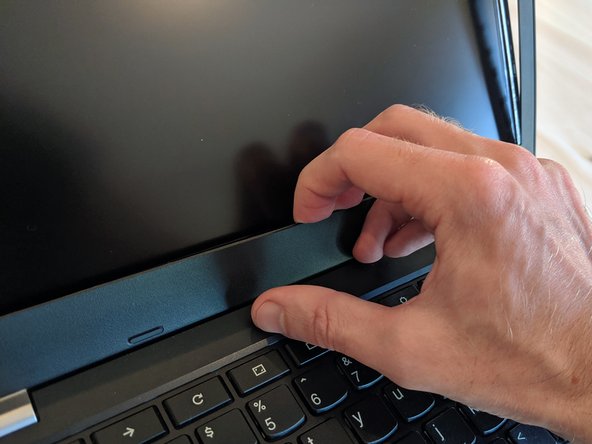
- Use the plastic opening tool to pull the panel forward and release it from the display assembly.
- You may need a little help from your fingers for the thicker bottom bezel.
- Be careful not to put pressure on the LCD itself, as it could damage the display.
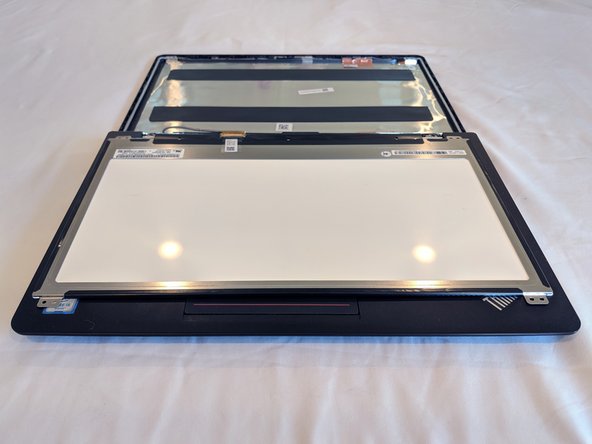
- Open the laptop completely to 180 degrees and lay it flat.
- Remove the four screws that secure the LCD panel to the plastic. Do not confuse these for the screws securing the hinge to the display assembly.
- Carefully separate the LCD panel from the plastic cover. and lower the screen onto the keys.
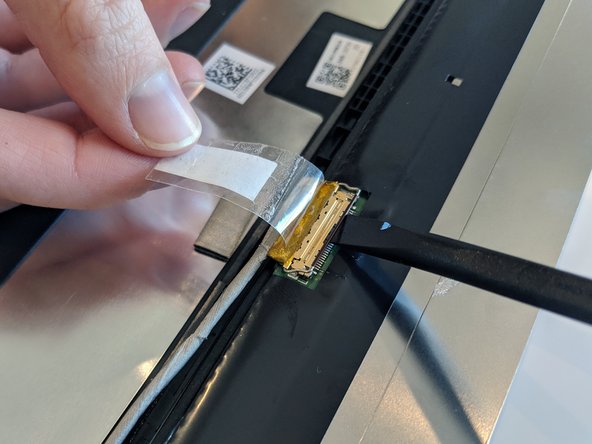
- Peel off the sticker securing the display cable to the LCD panel.
- Using the flat end of a spudger, lift the cable lock and gently remove the display cable from the LCD panel.
- Be very gentle removing this cable, as it is quite delicate.
- Remove the LCD panel.