Replacement the WiFi card on Dell XPS 12 9Q23
ID: 125532
Description: Your WiFi card no longer works and you want to...
Steps:
- Pop the center cover open on the bottom cover.
- Remove the center screw with a #00 Phillips screwdriver.
- Use a T5 Torx screwdriver for the remaining screws around the edge of the bottom cover.
- Carefully remove back panel after all screws have been removed.
- After the back panel has been removed, disconnect the battery to prevent electrical shock
- Use a Phillips #00 screwdriver to remove the 8 screws that secure the battery.
- Once all the screws have been removed the battery is now safe to extract
- We removed the battery to avoid electric shocks.
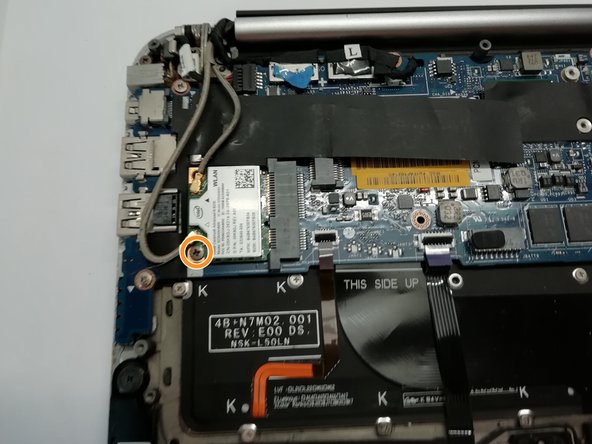
- Disconnect the two wires from the WiFi card. You can do this with a pair of pliers or your fingernail.
- Remove the screw with a #00 Phillips screwdriver.
- Now remove your WiFi card to replace it.