Replacement of the keyboard on a Dell XPS 12 9Q23
ID: 125534
Description: There you go! There you go! You have just...
Steps:
- Pop the center cover open on the bottom cover.
- Remove the center screw with a #00 Phillips screwdriver.
- Use a T5 Torx screwdriver for the remaining screws around the edge of the bottom cover.
- Carefully remove back panel after all screws have been removed.
- After the back panel has been removed, disconnect the battery to prevent electrical shock
- Use a Phillips #00 screwdriver to remove the 8 screws that secure the battery.
- Once all the screws have been removed the battery is now safe to extract
- Caution: Ensure your laptop has been powered down.
- Close the laptop, flip the laptop over, and pop off the back small panel with a flathead screwdriver. The panel will be hanging by the hinges once open.
- Use a T5 Torx screwdriver to remove the screws along the edge of the bottom cover.
- Use a magnetic board if possible to keep track of screws.
- Open the center cover and use a Phillips #00 screwdriver to remove single screw.
- Carefully remove the back cover.
- Caution: Be mindful of static electric charge across the battery port. Usage of an antistatic strap is recommended but not required.
- Disconnect the battery to prevent electrical shock.
- If battery replacement is desired then the battery may be removed at this point via removal of the battery's perimeter screws.
- Disconnect yellow-colored ribbon cable from its port which sits at the bottom left of the fan housing.
- Dislodge the CMOS battery.
- Unplug CMOS cable.
- This step is not completely necessary, it allows extra room to maneuver the fan in and out during replacement.
- Use a Phillips #00 screwdriver to loosen the screws that secure the heat sink's heat spreader.
- Screws cannot be fully removed from heatsink.
- Grip the heat sink from the sides and carefully lift it up to remove it.
- Heatsink is a device used for absorbing heat and necessary to remove to reach the fan.
- At this time there will be a whitish powder between the heatsink and the CPU. This powder below the heat spreader is degraded thermal paste. DO NOT wipe away this powder unless the thermal paste will be replaced upon reassembly.
- Use a Phillips screwdriver to remove the two cooling fan screws.
- Unplug the fan cable.
- The cooling fan can now be removed and a new one can be installed.
- Unplug the touchpad cable.
- Insert wisdom here.
- Use a Phillips screwdriver to remove the 4 touchpad screws.
- Remove the touchpad.
- We removed the battery to avoid electric shocks.
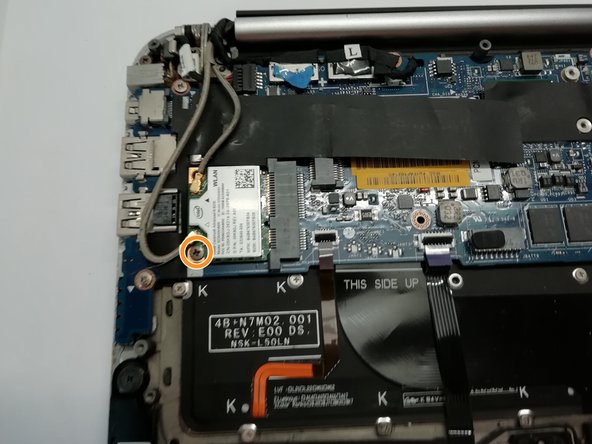
- Disconnect the two wires from the WiFi card. You can do this with a pair of pliers or your fingernail.
- Remove the screw with a #00 Phillips screwdriver.
- Now remove your WiFi card to replace it.
- We removed the battery to avoid electric shocks.
- Remove the adhesive tape.
- Remove the screw with a #00 Phillips screwdriver.
- Remove the hard disk from its location.
- We removed the battery to avoid electric shocks. The hard disk, WiFi card and fan have also been removed.
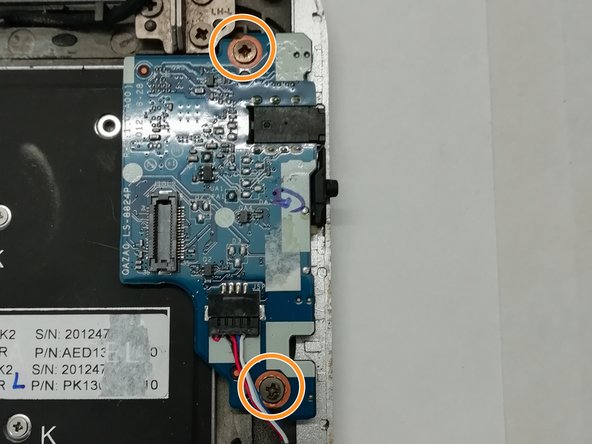
- Remove the connector with a pair of pliers or your fingernail.
- Remove the screws with a #00 Phillips screwdriver.
- Remove the card afterwards.
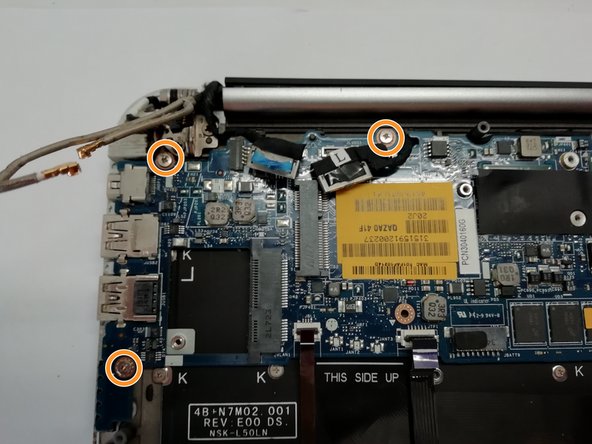
- Disconnect the various connections from the motherboard.
- Remove the screws with a #00 Phillips screwdriver.
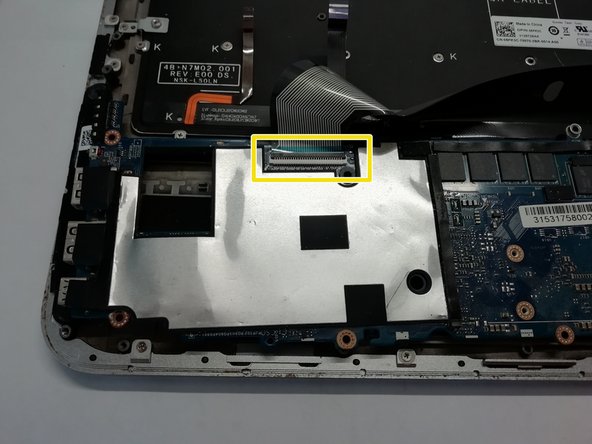
- Carefully turn the motherboard over to disconnect the tablecloth from the keyboard.
- You can now replace the motherboard.
- We removed the battery to avoid electric shocks. The hard disk, WiFi card, fan, touchpad and motherboard have also been removed.
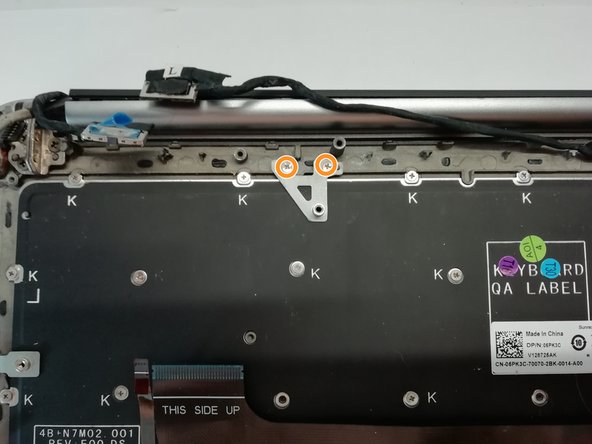
- Remove the screw with a #00 Phillips screwdriver and remove the bracket.
- Remove the screw with a #00 Phillips screwdriver and remove the support.
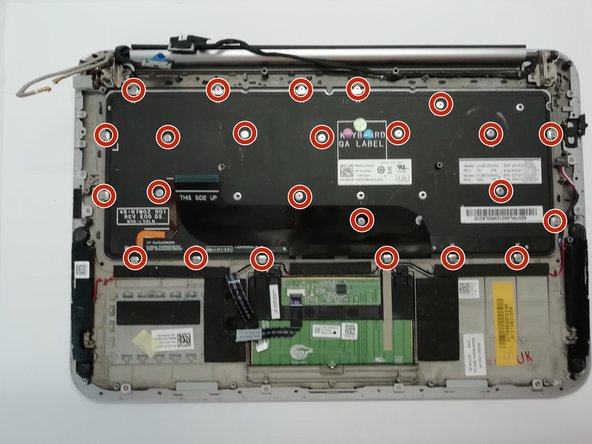
- Be patient and unscrew the 24 keyboard screws.
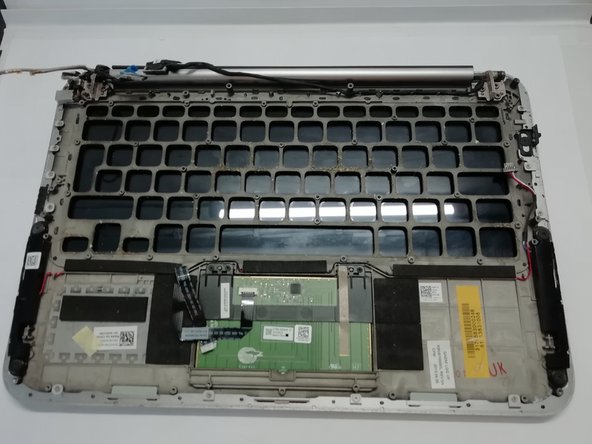
- You can now remove the keyboard. And also do a cleaning if necessary, as in the second photo.