Replacement of the back panel on Dell XPS 13 9380
ID: 125624
Description: You need to open or replace your Dell XPS 13...
Steps:
- Before you begin, be sure to turn off your laptop and unplug it from the outlet.
- Use a Torx T5 driver to unscrew the eight screws securing the back panel.
- Use a spudger to pry up and loosen the back panel.
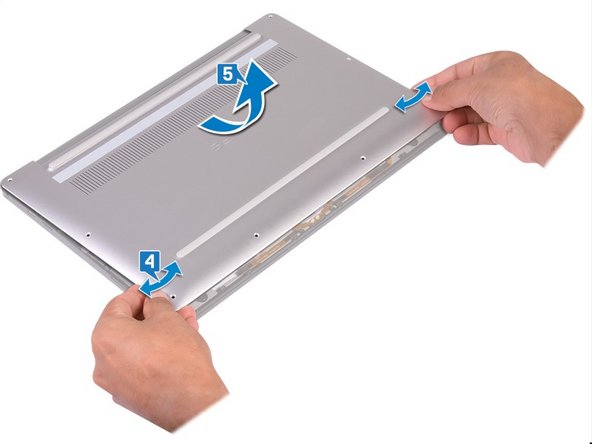
- Lift the back panel up slightly from the non-hinged edge.
- Pull the back panel away from the hinged edge, wiggling it back and forth to loosen the clips.
- When the back panel clips are free, remove the back panel.