2009 Nissan Armada Serpentine Belt Replacement
ID: 127682
Description: The serpentine belt is imperative to replace if...
Steps:
- Open the hood latch on the underside of the dashboard on the left side of the drive side.
- Once the hood is cracked, open it the rest of the way with the hood latch switch located in the middle of the hood.
- Now that the hood is open, remove the plastic shield that covers the engine by loosening the two 10mm bolts.
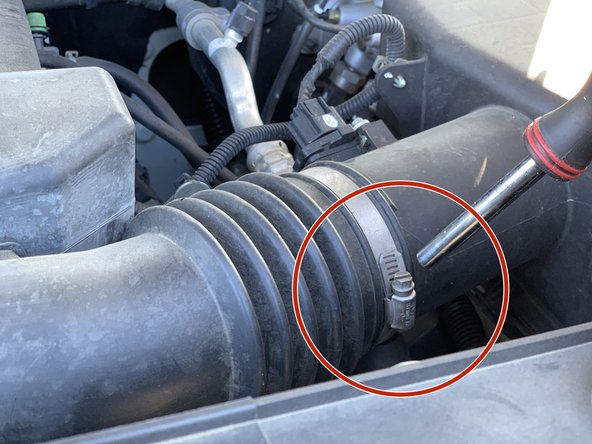
- Loosen the hose clamps with an 8mm socket that hold the air intake to the throttle body and to the airbox.
- Touch your hand to the proper belt tensioner pulley, which is the second pulley from the left.
- Attach your breaker bar to the tensioner pulley, and pull towards the left to remove tension.
- Insert the pin into the slot provided so that you do not have to keep holding the breaker bar. (This step is not necessary but is a highly advised option).
- Remove the belt from the pulleys and discard.
- Find the proper belt routing inside your owner’s manual. It is also found on the back of the new belt box.
- Install the new belt by properly routing it across the pulleys following the proper belt routing. (See step 9 for proper routing).
- Attach the breaker bar to the tensioner pulley again, and remove the pin making sure the belt stays in place.
- Return to steps 4 and 3 and complete these steps in reverse order.
- Start the engine, and make sure that the belt is not squeaking or making any unfamiliar noises.
- Close the hood, and you are ready to head down the road!