Xbox One S All Digital Edition Bottom Metal Shield Replacement
ID: 127685
Description: This guide shows the steps necessary to get the...
Steps:
- Position the iFixit Opening Tool's riveted edge in between the top and bottom cover of the plastic enclosure.
- Apply downward pressure on the iFixit Opening Tool until the security clip unlocks.
- Repeat on different points of the plastic enclosure until the bottom cover is removed.
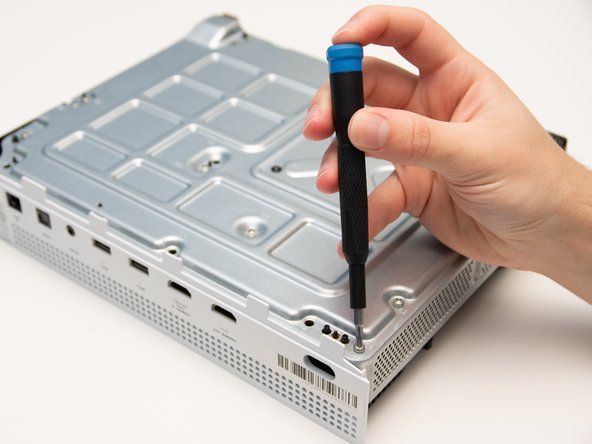
- Remove the six 50 mm green screws (labeled F1-F6) from the metal chassis using a Torx 10 screwdriver.
- These screws hold the top cover of the plastic enclosure to the chassis.
- Apply pressure to peel off the sides of the casing.
- Separate the metal chassis from the top cover, lifting the back of the chassis up and away from the top cover.
- The plastic back panel is meant to stay attached to the metal chassis.
- Flip the metal enclosure so that the fan cover is on top.
- Remove the two 15mm screws from the front panel using the Torx T8 screwdriver.
- Carefully slide the top metal case off the frame.
- This may require shifting the case side to side as you slide up.
- Remove the eight 10mm screws from the bottom of the metal casing using the Torx T9 screwdriver.
- Remove the four 15mm screws from the bottom of the heatsink fastener using the Torx T8 screwdriver.
- Remove the two plastic pieces from the motherboard.
- Lift the motherboard up from the metal chassis.
- The motherboard should easily separate from the metal chassis.