Toshiba Satellite C875-S7304 Motherboard Replacement
ID: 127704
Description: Use this guide to replace a faulty or dead...
Steps:
- Power off and unplug the charger from your device.
- Carefully flip your device upside down laying it onto a flat surface with the battery facing you.
- The two eject switches are located on the right and left side of the battery compartment.
- Slide the right switch further towards the right to lock it into place.
- Slide the switch to the left. Continue to push the switch because unlike the right switch, it will not lock into place.
- Using both hands, continue to push the left switch and grasp onto the center notch located in between the right and left switch.
- Pull the center notch towards you and you will notice the battery will start to eject.
- Lift the battery out carefully using two hands.
- Carefully flip the device back over so that the 'TOSHIBA' logo faces away from you.
- Open the laptop to display the keyboard.
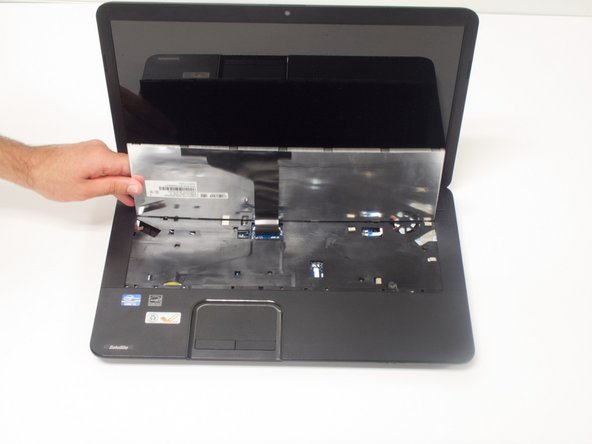
- Using the iFixit opening tool, carefully remove the black plastic bar below the keyboard.
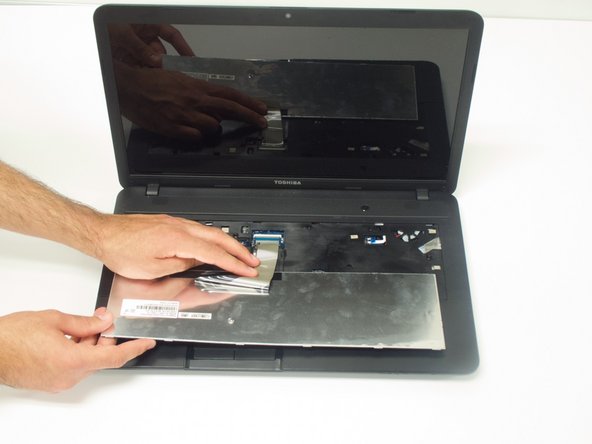
- Pry the keyboard up and apart from the device.
- Disconnect the ribbon cable under the keyboard.
- Use a Phillips #1 screwdriver to remove all eight of the screws under the keyboard.
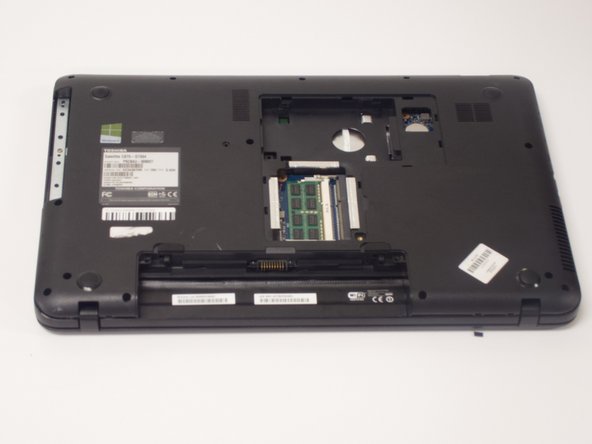
- Close the device and carefully flip it back over.
- Use a Phillips #1 to unscrew one 7.0 mm screw from the hard drive/RAM panel and remove panel.
- Slide the hard drive laterally first and then lift the hard drive up using the clear tab.
- You cannot remove the screw from the panel. Simply unscrew it until loosened.
- Use a Phillips #1 to remove all 15 of the screws holding the bottom panel intact.
- Grab the optical drive on either side.
- Pull the drive out of the device laterally.
- Gently pry open the entire bottom panel, pulling upward to remove the panel from the device.
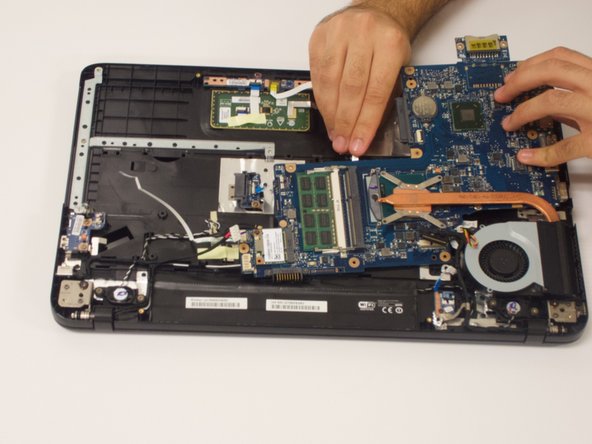
- Remove all wiring from the motherboard and pry it from the device slowly making sure that no ribbons or wires are connected.
- Gently remove the motherboard from inside the device. You are now ready to replace the motherboard.