Hover 1 Eclipse Shell Replacement
ID: 127726
Description: This guide will aid you in replacing the shell...
Steps:
- Using a Phillips #1 Screwdriver, remove the four 11mm screws that surround the edge of the plug side bottom shell piece.
- Using a Phillips #1 Screwdriver, remove the four 13mm screws that surround the edge of the plug side bottom shell piece.
- Remove the plug side bottom shell piece.
- Be cautious of the wires connecting the plug side shell piece to the body. Do not pull the piece off until these wires have been disconnected in the following step.
- Using a Phillips #1 Screwdriver, remove the four 11mm screws that surround the edge of the remaining bottom shell piece.
- Using a Phillips #1 Screwdriver, remove the four 13mm screws that surround the edge of the remaining side bottom shell piece.
- Remove final bottom shell piece
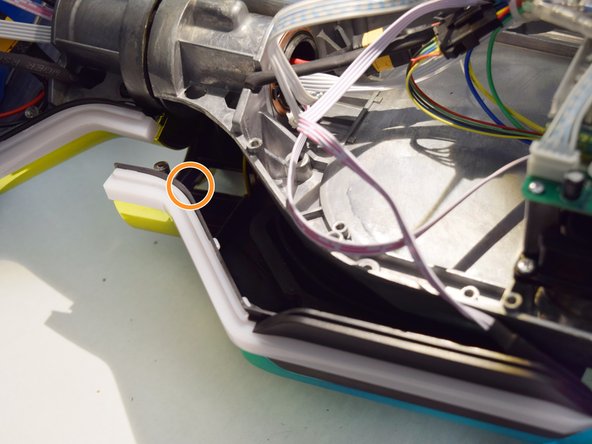
- On the bottom plug side shell pieces, there are two white and pink wires connecting the shell and the motherboard.
- On the circuit board by the speaker, carefully squeeze and unplug the small white headers that connect the shell piece to the hoverboard body.
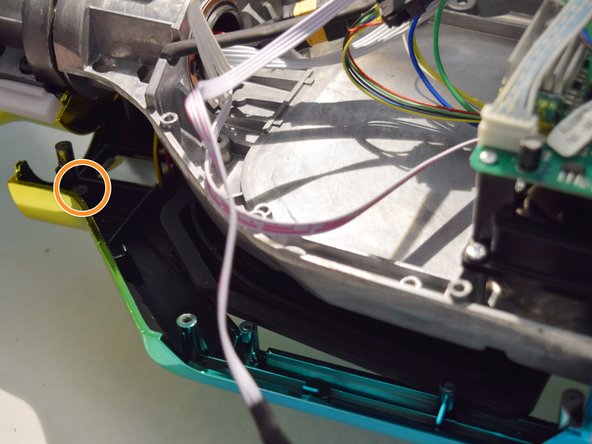
- Follow the wires that connect the lights to the motherboard. Disconnect these wires from the motherboard by squeezing and pulling the small white headers.
- Now you can fully remove the bottom plug side shell piece.
- Unplug the yellow tipped plug attached to the red and black cord on the non-battery side.
- Using a Phillips #1 Screwdriver, remove the twelve 11mm and 13mm screws that line the bottom inside of the battery side of the Hover-1 Eclipse.
- The screw placement is mirrored on the other side
- Repeat these steps for the left inside of the Hover-1 Eclipse.
- Push down the shell and LED light near the center of the board as shown.
- In the newly exposed area, there will be an 11mm screw holding in the wire that connects to the LED light of the frame. Remove this screw.
- Now separate the light from the shell and board.
- Repeat this for the other 3 lights.
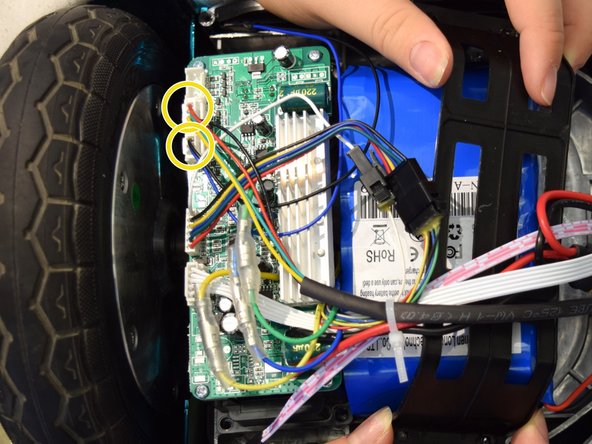
- Follow the rainbow cord that connects the left side shell piece to the inside board. Find where it is plugged into and disconnect it.
- The cord is a bundle of multicolored wires sheathed in black, halfway down.
- Follow the black and blue cord that connects the left side shell piece to the inside board. Find where it is plugged into and disconnect it.
- Repeat for the top right shell piece.
- Remove both shell pieces.