Nook BNRV300 Battery Replacement
ID: 127760
Description: The battery is one of the most common...
Steps:
- Power off your Nook before working on your device. Hold the power button for about 5 seconds and select the “Power Off” option.
- Turn the Nook over to find the power button along the back upper edge.
- Wedge the spudger between the top of the power button and the upper edge of the device.
- Push the tool down to pry the button up and off.
- Using your fingers, take off the power button.
- Peel off the white sticker that is covering the screw head.
- Remove the one 2mm-long screw using a size T5 Torx screwdriver.
- Slide the back cover down towards the USB port to release the back cover.
- The pictures show the case being pried open, but do not do this unless it is necessary.
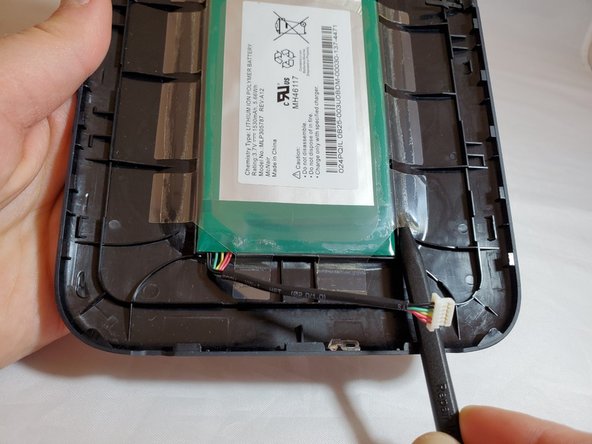
- Use a spudger or your fingers to gently pry the connector out of the white socket.
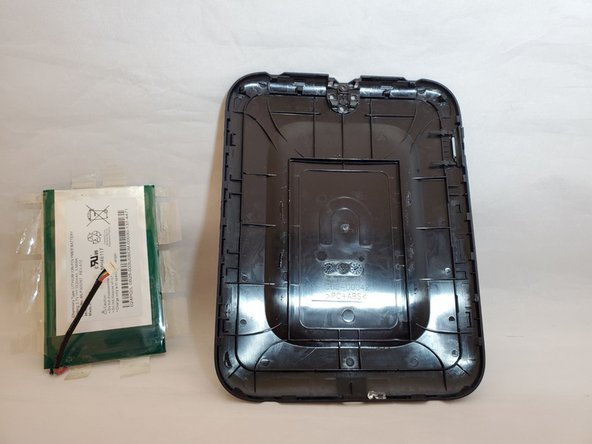
- The back cover is now fully detached.
- Use tweezers to remove the brass-colored threaded fastener from the Nook plastic casing.
- The battery is located on the inside back cover of the Nook.
- Do not use metal tools when prying up the battery. This may puncture the battery and cause harm to you and/or your device.
- Insert a nylon spudger beneath the clear plastic adhesive holding the battery to the back cover.
- Work around the battery, peeling up all of the adhesive.
- Hold on to one of the adhesive tabs and pull up.
- This will fully remove the battery from its compartment.