Hover-1 Charger LED Headlight Replacement
ID: 127832
Description: If the LED headlights on your Hover-1 Charger...
Steps:
- Flip the hoverboard over so that the warning label is facing up.
- Remove the twelve 12 mm screws with a Phillips #2 screwdriver.
- Remove the four 10 mm screws with a Phillips #2 screwdriver.
- The screws nearest to the wheels may be hard to access. Be sure to use a long, thin screwdriver.
- Pull the right cover away from the hoverboard to expose the battery.
- Disconnect the two pronged black and yellow cable.
- Pull the left cover away from the hoverboard.
- Disconnect the two pronged black and yellow cable. The battery is now fully disconnected.
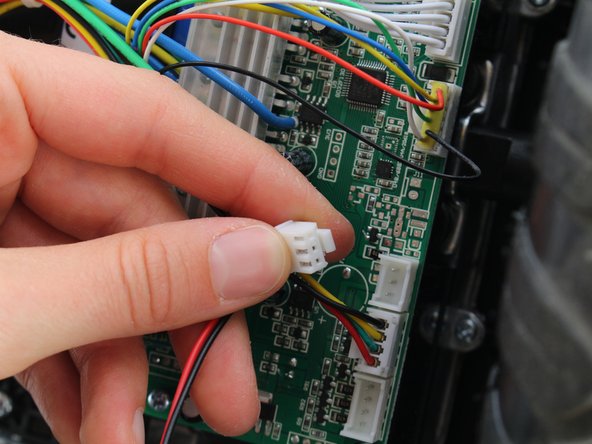
- Remove the black and red two pin connector from the circuitboard.
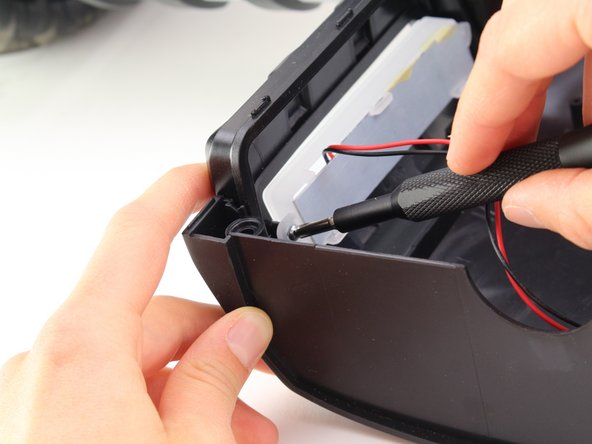
- Remove the two 12mm screws holding the LED to the front cover with a Phillips #2 screwdriver.
- Our Hoverboard was missing a screw in the LED housing. Yours may or may not be missing screws as well.
- With the wire unplugged and screws removed, you can now safely seperate the LED from the Hoverboard.