HP Envy x360 m6-w103dx Fan Replacement
ID: 127833
Description: This replacement guide is for the fan of the HP...
Steps:
- Before you begin, be sure to power off your laptop.
- Using an opening pick, remove the 4 rubber feet and 4 screw covers.
- Unscrew the twelve 6 mm screws from the bottom of the laptop using a Phillips #0 screwdriver.
- Open the laptop carefully, with the keyboard face up.
- Pry around the outside of the keyboard with the plastic opening tool until the keyboard can be lifted slightly.
- When lifting the keyboard do not pull too hard. There are cables that must be disconnected before the keyboard can be removed.
- Lift the keyboard until you can see the cables connected to the motherboard.
- Gently lift the tab on each ZIF connector that connects each cable to the motherboard using a spudger. Once each tab is flipped up, the corresponding ribbon cable will come out easily.
- Detach the keyboard.
- Disconnect the pin head battery connection to remove power from the motherboard.
- Unscrew the five 4mm screws holding the motherboard in place using a #0 Phillips screwdriver.
- It's possible the positions of the screws will be different on your board. If the motherboard resists lifting, double-check that all screws have been removed.
- Remove the five flat ribbon cables by gently lifting the head of the cable up and back.
- Remove the two remaining multicolored ribbon cables by pulling the white plastic head backwards.
- Do not pull directly on the wires.
- If the head of the multicolored ribbon cable doesn't come out, try gently wiggling it side to side as you pull.
- Lift the motherboard up from the left side at a shallow angle.
- Gently pull the motherboard to the left and gently wiggle it side to side until the ports on the right side of the board detach from the case.
- Ensure the laptop is well supported, as the motherboard is a heavy component and removing it may make the laptop off-balance.
- Carefully lay the motherboard on a flat surface with the metal plate facing up.
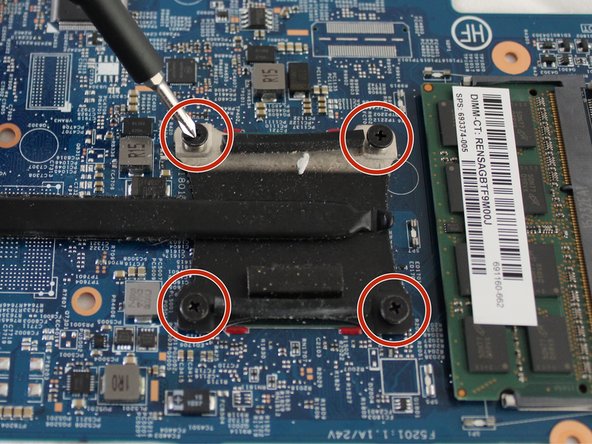
- Unscrew the four 6.0 mm screws from the heatsink using a #00 Phillips screwdriver.
- The screws do not detach from the component, just the motherboard.
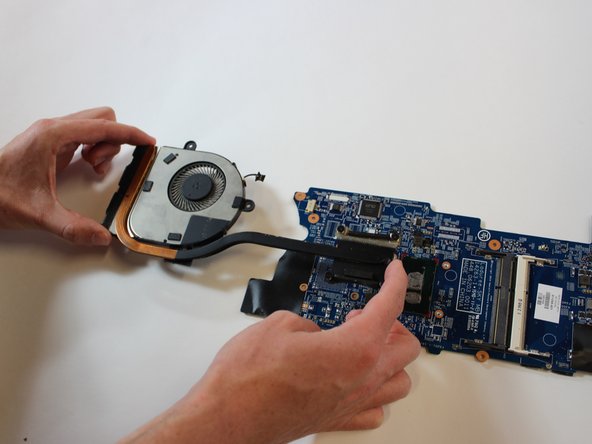
- Disconnect the fan pin-head connector.
- Carefully lift the fan assembly and pull away from the motherboard.
- When reassembling, be sure to clean the old thermal paste from the heatsink and CPU contact points. Then, reapply new thermal paste with our How to Apply Thermal Paste guide.