Lenovo Yoga 730-13IKB Storage Replacement
ID: 130492
Description: Use this guide when replacing the storage drive...
Steps:
- Power off the laptop and place it facedown on a non-scratching surface.
- Remove the nine T5 screws fastening the back case.
- Slide a plastic opening tool underneath the back case near the screen hinges. Gently pry up on either side.
- Slide the opening tool underneath the back case next to the middle screw hole at either side of the case. Gently pry up.
- You may hear popping sounds as the tabs securing the case release. This is normal. If the case does not move, try prying at a different angle/position.
- Remove the back case by pulling up near the screen hinges and lifting diagonally away from the laptop.
- Go slowly to avoid breaking any connecting tabs.
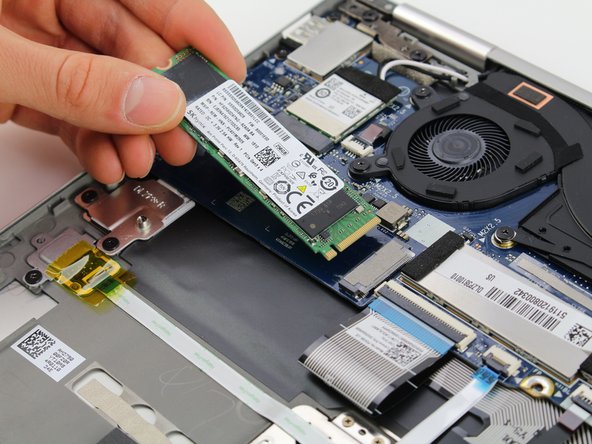
- Use a Phillips #00 screwdriver to remove the 4mm screw holding down the storage drive.
- Hold onto the back of the storage drive and slightly lift up.
- Remove the drive by pulling back at a diagonal angle.
- To install the storage drive, insert it into the connector at a slight downwards angle. The drive connector is keyed and will only go in one way.