Lenovo Thinkpad X1 Carbon 4th Gen Fan Replacement
ID: 130561
Description: If the cooling fan in your Lenovo ThinkPad X1...
Steps:
- Unscrew the nine captive screws on the bottom cover of the laptop using a Phillips #1 screwdriver.
- The screws do not fully come out of the back cover, so there is no need for screw management.
- There are a few small clips around the edge that you may need to pry at to free them. An opening pick may be helpful for this process.
- Lift the back cover up and off of the computer.
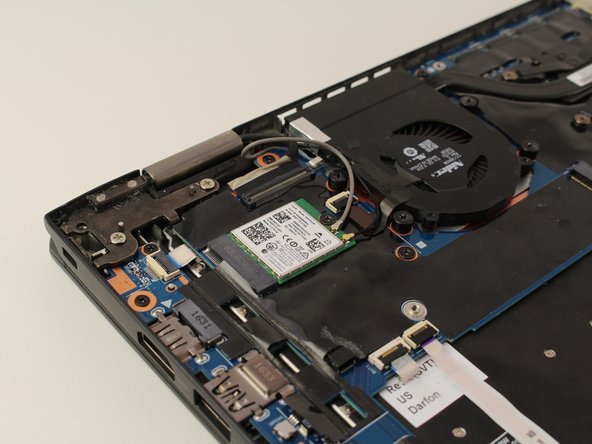
- Peel off the black protective film to the left of the fan.
- Do not remove the four screws closest to the fan. They do not affect the fan assembly.
- Disconnect the antenna wires on green the wireless LAN card to the left of the fan.
- Lift up the hinge connector that is attached to the fan's ribbon cable.
- Carefully disconnect the cable by pulling outwards from the ribbon connector.
- Loosen the screws on the 'x' configuration of metal.
- These screws are held on to the metal 'x', so don't worry about them falling out.
- Lift the fan upwards from the board.
- It's best practice to replace the old thermal paste under the 'x' configuration of metal. (Guides on how to replace thermal paste can be found here.)