Oontz Angle 3 ULTRA Driver Replacement
ID: 132262
Description: If your Oontz Angle 3 ULTRA speaker is playing...
Steps:
- Remove the two black rubber sheaths around the edges of the speaker.
- Under the symbol-marked sheath there is a white rubber covering for the buttons. Peel this away to reveal the panel underneath.
- On two corners of its triangular face there is a small divot, which allows you to use your fingernails or a pair of tweezers to grip and peel away the covering.
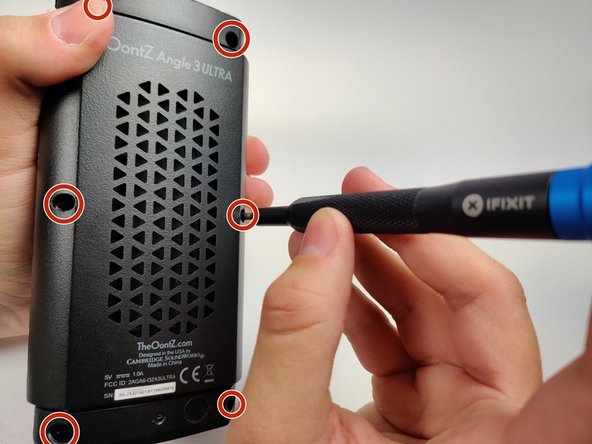
- Use a JIS #0 screwdriver to remove the six screws to expose the motherboard.
- Using a pair of tweezers, pinch and pull the rubber fillings obstructing the screws.
- Using a JIS #0 screwdriver, remove the 6 screws holding the backplate in.
- Remove the back panel off of the device.
- Insert the Jimmy into the gap between the speaker's grill and the plastic enclosure.
- Work the Jimmy around the gap to free it from the speaker enclosure.
- The grill edges are sharp. Be careful and patient when performing this step to avoid injuring yourself.
- Locate the wires connecting to the driver. There will be a red wire connected to the driver’s positive terminal, and a black wire connected to the driver’s negative terminal.
- During reassembly, it is important to orient the wires properly to avoid damage to the speaker and new drivers.
- With your soldering iron and solder sucker, remove the solder connecting the wires to each terminal, and then gently pull the wires away from the terminals to free them.
- For more information on soldering and desoldering connections, please read the How to Solder and Desolder Connections Guide.
- Remove the eight screws with the Phillips #0 screwdriver.
- Gently push the driver from the rear out of the enclosure to remove it.