Xbox 360 S PSU Disassembly
ID: 132479
Description: This guide can be used for repair/refurbishing...
Steps:
- Remove rubber boots
- Remove T10 Screws
- Remove the top shell, flip it over, and place next to lower shell
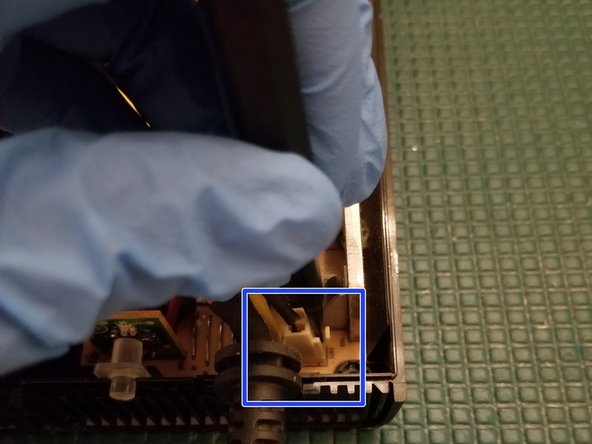
- The two halves are connected together via the cooling fan wire. BE GENTLE when separating them
- In typical Microsoft fashion, they've made it complicated to remove the fan wire. Not only is it wedged between two transistors it's also adhered with an epoxy like substance.
- Using a craft knife, carefully cut through the epoxy to get the cable free. Work slowly and carefully. The thick substance and awkward angles make this a slightly tedious process
- Be VERY CAREFUL. You can easily cut the cable here accidentally. If you cut your red/black wires you'll have to patch them. "Slow is smooth, smooth is fast"
- Remove PH2 screws
- Remove PH1 screws
- Removal unnecessary
- Disconnect cooling fan plug
- Pull wire through
- Remove tape in order to remove fan from its housing unit. This also uncovers a hidden screw.
- Remove 4 PH0 screws
- Tape will need to be replaced during reassembly. Electrical or kaptom tape will suffice
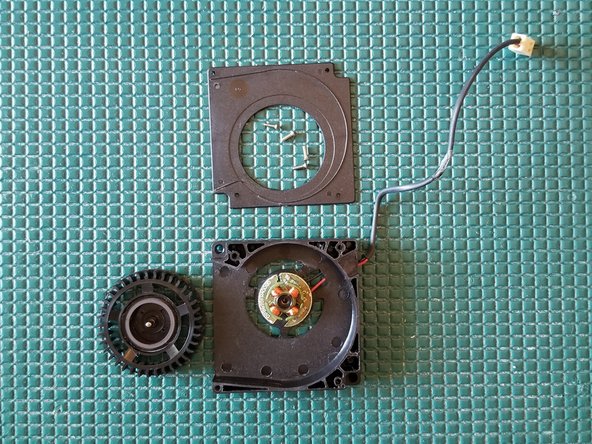
- Take note of the amount of filth collected on this fan. Inadequate cooling could kill your supply, or worse, become a fire hazard
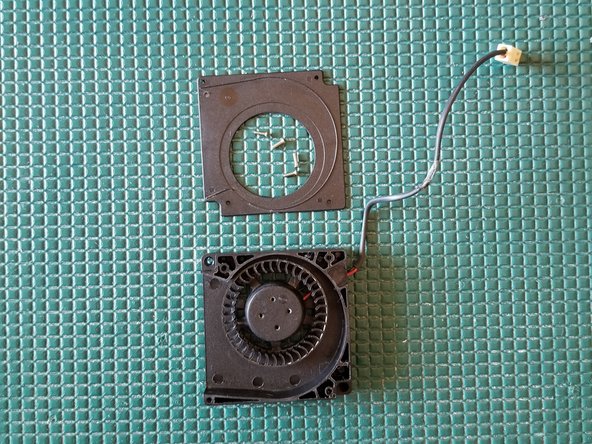
- Remove fan upper housing plate
- Gently lift the fan up and over the post
- Fan model info in case you need to search out new parts
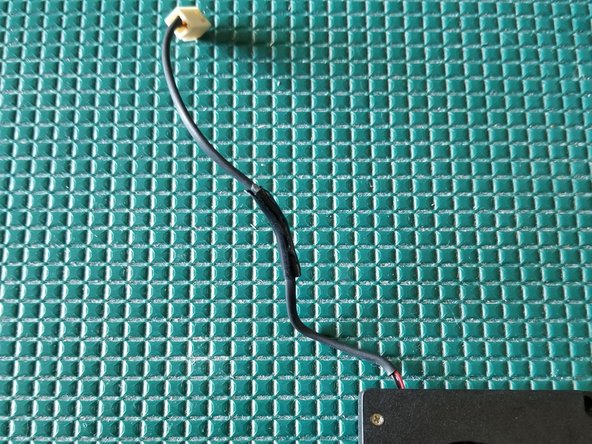
- The fans +/- wires are covered by a thin protective sleeve.
- Apply some electrical or kaptom tape to patch it if necessary.
- Initially I tried to use shrink tubing here but the smallest diameter I could get around the plug was a 3/8" tube which will not properly seal around the cable when heated
- If you accidentally cut through the entire cable (+/- wires) you'll have to resolder them together and cover with shrink tubing.
- Remove PCB from lower shell and place face down
- The metal shield must be removed in order to expose the bottom of the power supply PCB
- To quickly and safely remove I suggest using ChipQuik on the 2 single sided through holes. Alternatively you can use solder wick