How to sew your own facial mask.
ID: 132523
Description: Sewing your own mask? It is simple! You need 2...
Steps:
- Cut out 2 pieces of fabric sized 17x20 cm and 17x25 cm.
- 17 cm = 6.7 inch, 20 cm = 7.9 inch, 25 cm = 9.8 inch
- Cut elastic bands with a length of 20 cm.
- 20 cm = 7.9 inch
- Lay both pieces of fabric right to right ( "nice" sides together ) in the middle on each other. Before doing this ironing is recommended.
- Sew together both pieces on the long side with a 1 cm distance from the side. At the beginning and the end of the seams it is strongly recommended to sew a short piece back and forth to prevent the seam from opening.
- 1 cm = 0.4 inch
- Turn, i.e. pull out the previous inside so it is now the outside.
- Iron the sides of the piece with the seams.
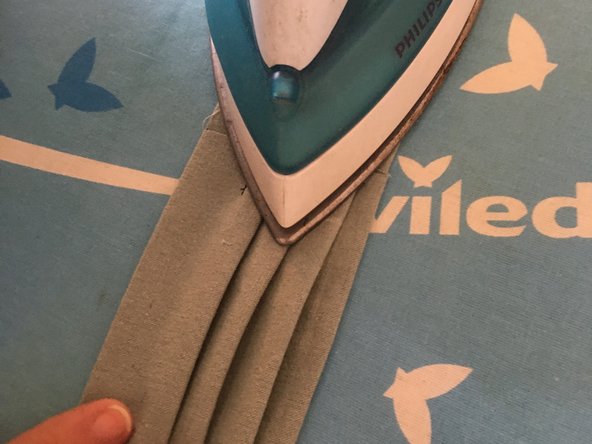
- Fold the outer sides and iron the edges, first in the middle. Then unfold again.
- Then fold both sides towards the middle, along the first crease. Iron again.
- There should be three edges, the direction of the fold is towards the inside.
- Place chalk marks every 4 cm from the long outer edge. On both sides.
- 4 cm = 1.6 inch
- Fold over each of the 6 edges and sew up to the mark, keeping a 1 cm seam allowance from the edge. Depending on the sewing direction, tape on the sewing machine bed can be used as a guide instead of a chalk mark. Repeat 6 times.
- Lay the fabric out and iron the seams to one side.
- Fold in the outer edges by 1 cm and iron. Keep it as straight as possible, so not like in the 2nd picture...
- Insert the elastic with a 1 cm allowance and fold it over again.
- Sew the cover to the elastic band. For the second elastic band, make sure not to twist the band.
- To keep the edges from sticking out away from the face, sew a second seam directly along the outer edge, or simply sew the elastic bands down once more.
- And you're done!