Garmin Nuvi 2529 Disassembly
ID: 132686
Description:
Steps:
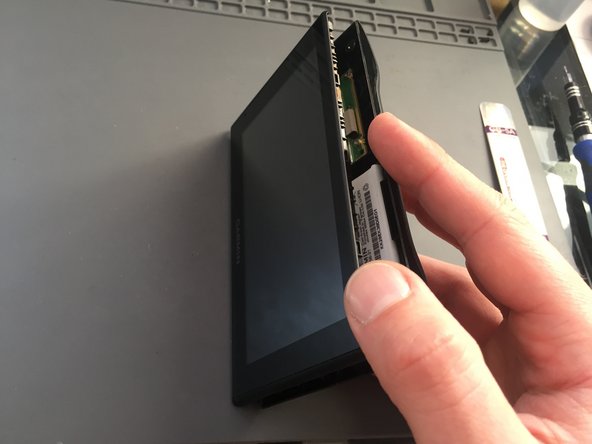
- Turn the device over and remove the 4 x T5 screws.
- Use the prying tool to release the platic clips on the back, going around all the sides.
- Start prying from the sides or the top left corner and work your way around the screen.
- Be careful at the bottom as the screen connector is still attached. Don't try to fully remove it.
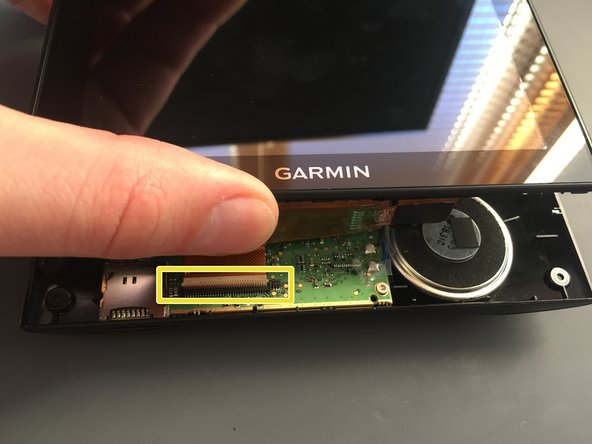
- Slide the screen slightly upwards to reveal the connector
- Slide up the screen to get access to the connector
- Use the plastic prying tool to lift up the latch that secures the ribbon cable and then slide the cable out.
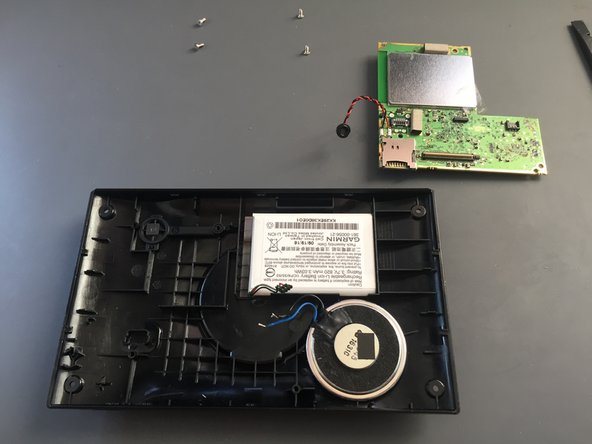
- Once the cable is out, lift off the screen.
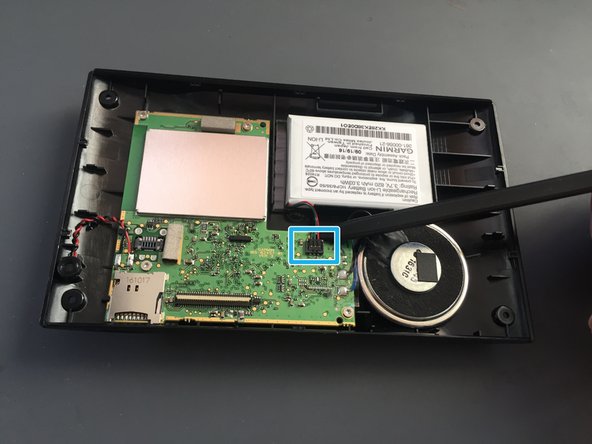
- Before you can take the logic board out disconnect the battery.
- Remove the microphone from its socket with a plastic spudger.
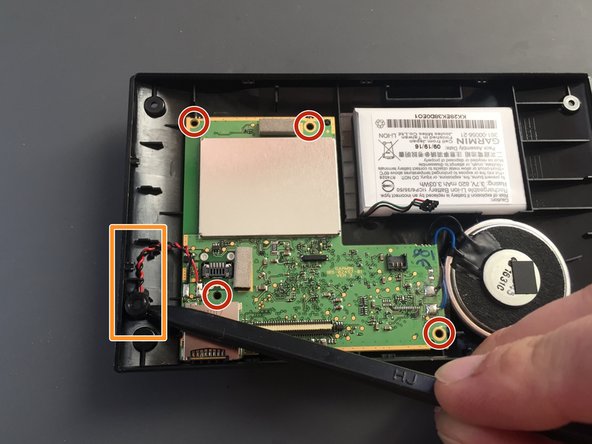
- Remove the 4 x T5 screws that secures the logic board to the back cover.
- Peel off the clear tape from the speaker connections with tweezers.
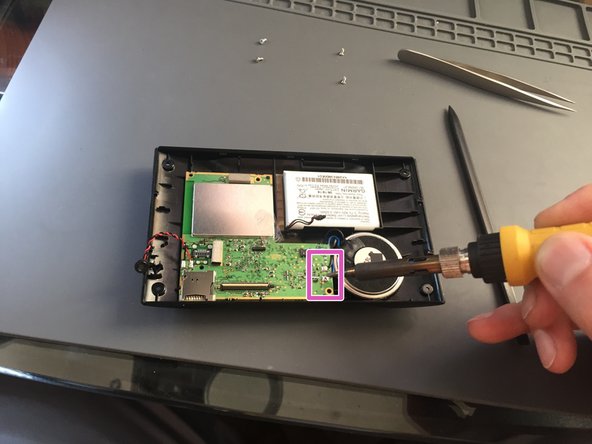
- Use your soldering iron to de-solder the two wires from the speaker.
- Try to minimise the contact time with your iron on the bard to avoid warping and thermal shocking the board. (I used 390 C ~ 740 F)
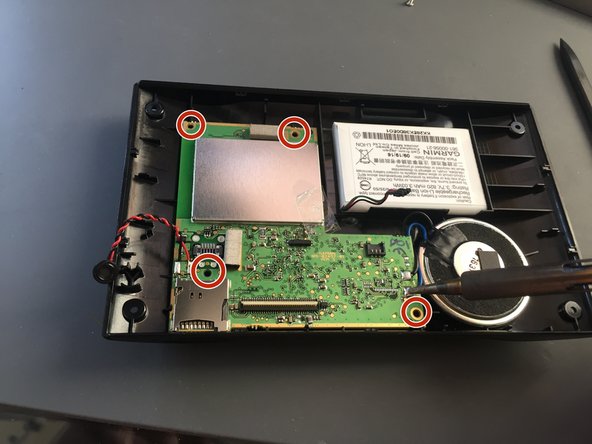
- Finally remove the 4 x T5 screws that secure the logic board to the back cover.
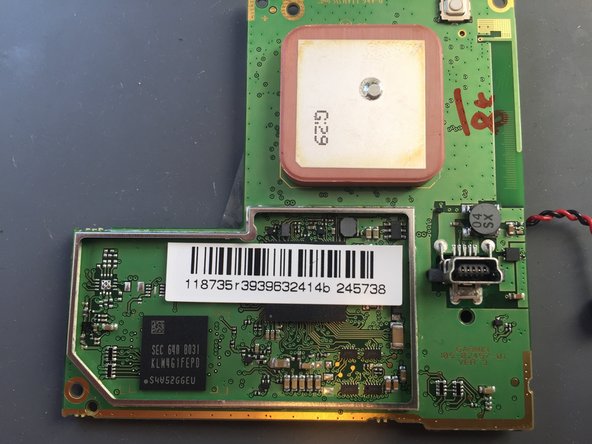
- Use the spudger to pop the lociboard out.
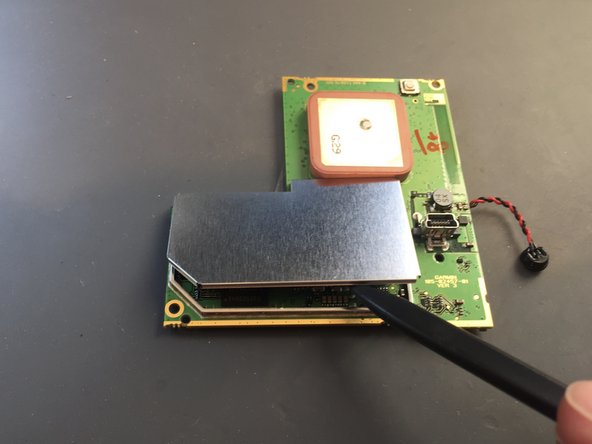
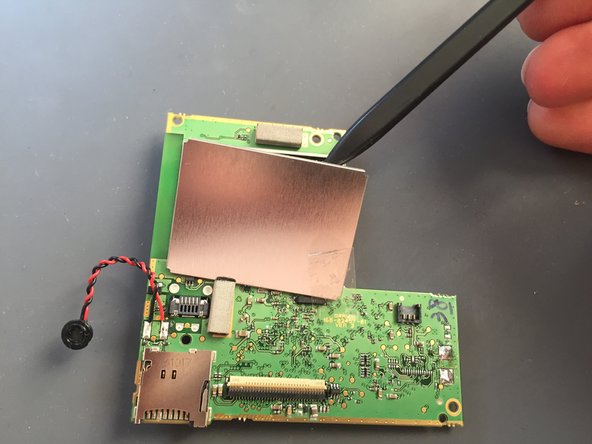
- To reveal all the components, use the spudger to lift off the metal cover of the protected circuitry
- Make sure you apply even pressure and don't force the cover off. If it is bent whilst removing, it will be difficult to reassemble.
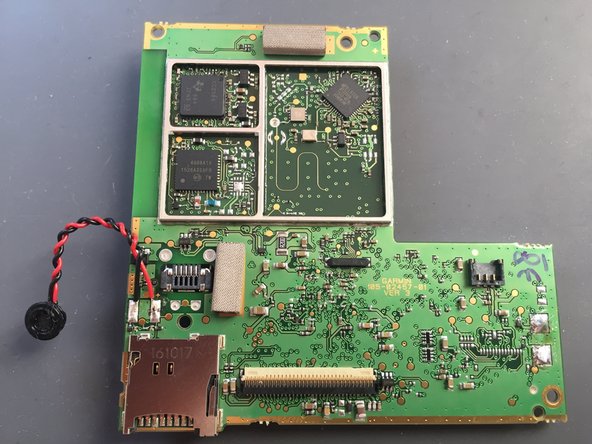
- Repeat the same step on the back of the logic board.
- Now you successfully exposed all the parts.