Presto Carpet Extractor 9.840-068.0 2016 Pump Replacement
ID: 132751
Description: Follow this guide to remove or replace the pump...
Steps:
- Ensure your carpet extractor is unplugged and switched off before starting this procedure.
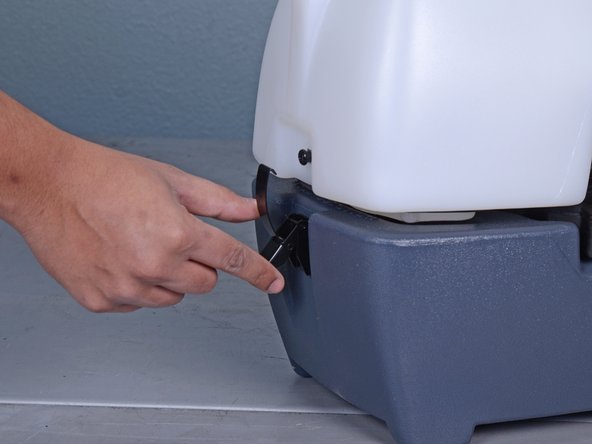
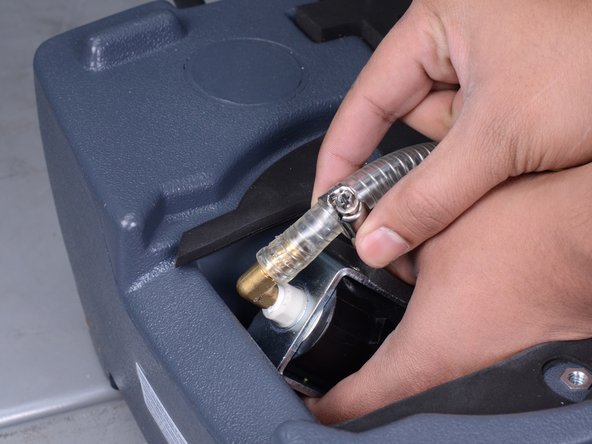
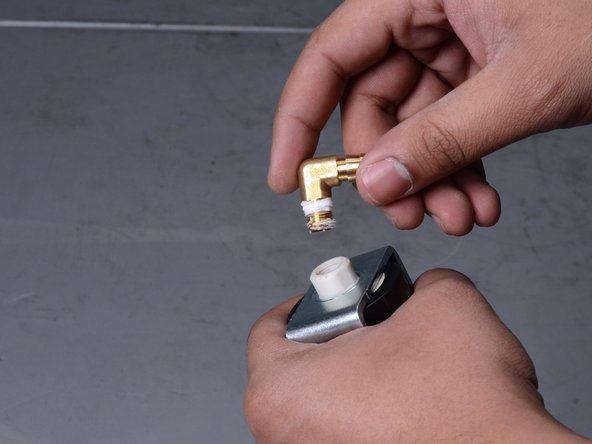
- If it is still attached, pull and disconnect the brass quick-connect fitting from the carpet extractor body.
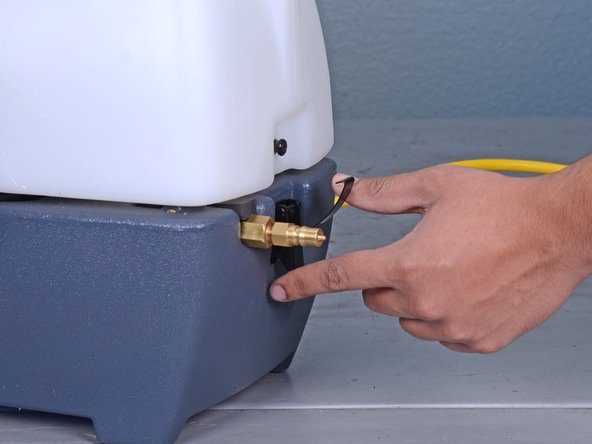
- If it is still attached, disconnect the black hose from the recovery tank.
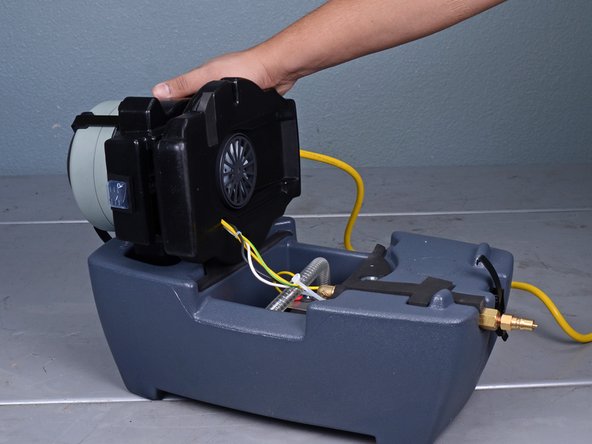
- Unclasp and release the two black latches on either side of the carpet extractor.
- Remove the recovery tank.
- Use a Phillips #3 screwdriver to remove the two 1-1/2" screws and washers securing the pump housing.
- Tilt the vacuum motor and pump housing sideways and let it rest on the side of the extractor.
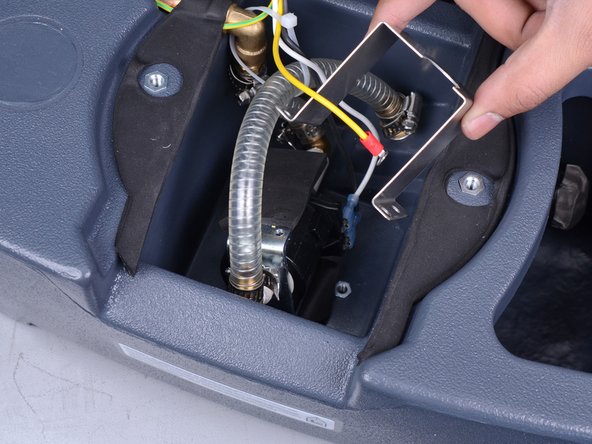
- Use a Phillips #2 screwdriver to remove the two 1/2" screws and star washers securing the pump mounting bracket.
- Use a Phillips #2 screwdriver to remove the ground terminal screw and star washer from the pump.
- Lift and remove the pump mounting bracket.
- Take care to not snag the sharp edges of the mounting bracket on any wires or hoses as you remove it.
- Use a flathead screwdriver to loosen the hose clamp on back side of the pump.
- We strongly suggest you replace this hose clamp during reassembly to prevent leaks during operation.
- Slide the loosened hose clamp back until it is no longer around the brass fitting.
- Pull the hose straight off of the brass fitting to remove it from the pump.
- If this is too difficult to do by hand, use a pair of pliers to carefully work the hose off of the fitting until it is free.
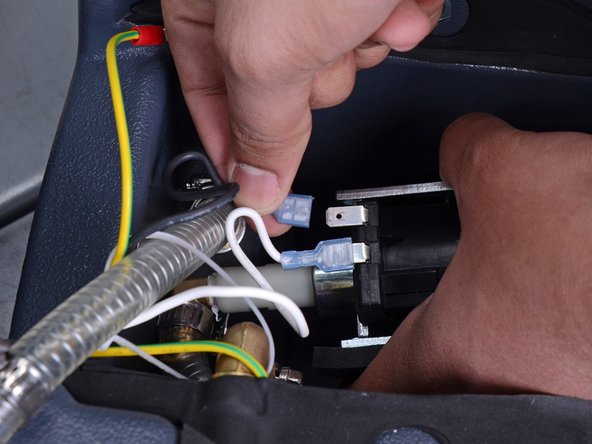
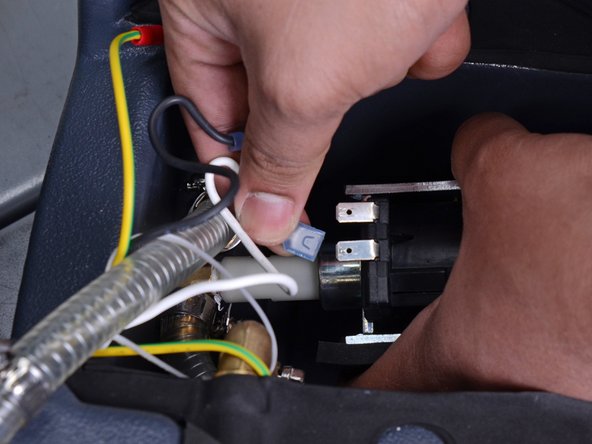
- Disconnect the two crimp connectors from the pump body.
- Take note of which wire connects where for reassembly.
- This may require a significant amount of force; pull and wiggle the connector until it's free.
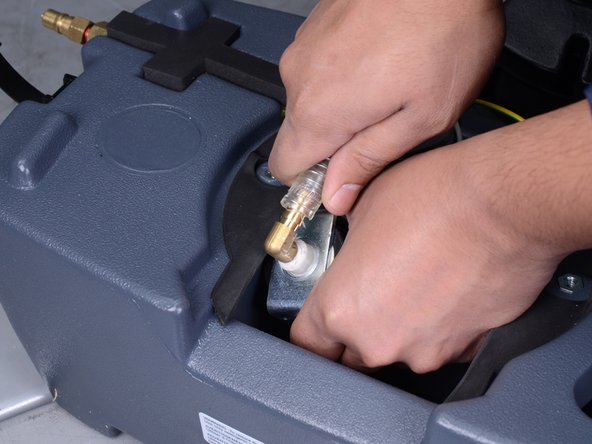
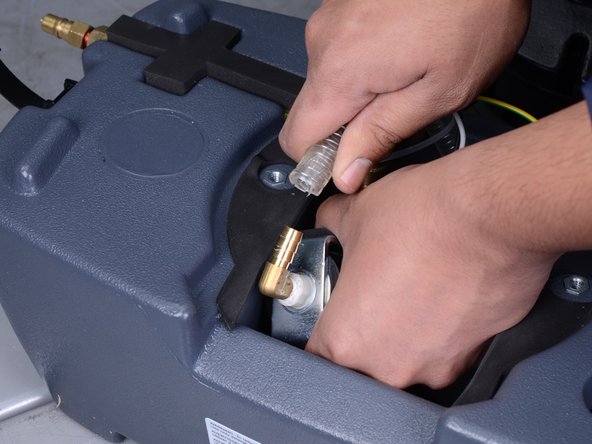
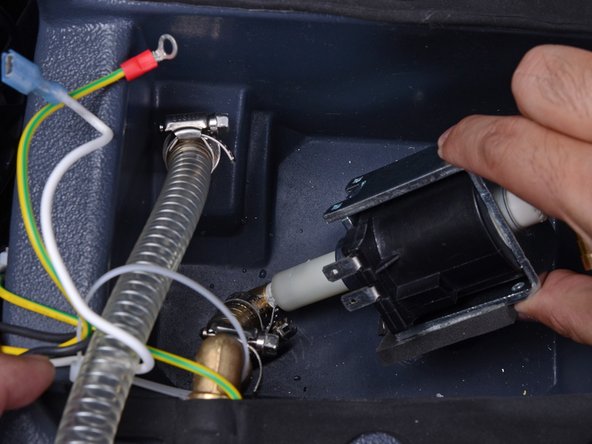
- Twist the pump body counterclockwise until it is disconnected from the fitting at the other end of pump.
- Remove the pump from the extractor.
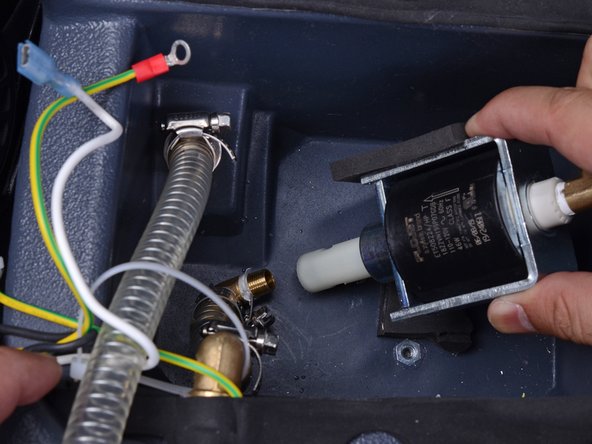
- Before installing the new pump during reassembly, replace the teflon tape on the brass fitting to prevent leaks during operation.
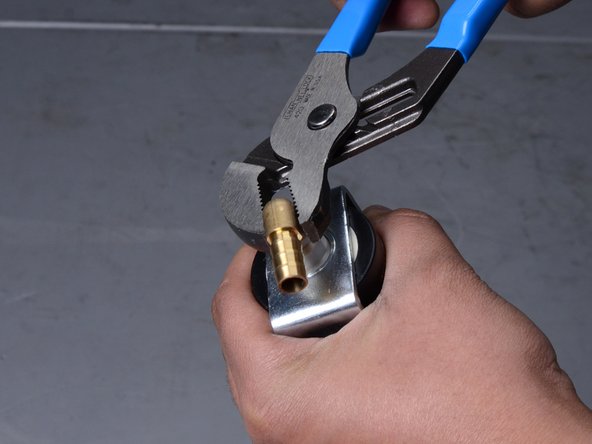
- Use a pair of pliers to unscrew and remove the remaining brass fitting from the pump.
- Replace the teflon tape on this brass fitting before installing it into the new pump to prevent leaks during operation.
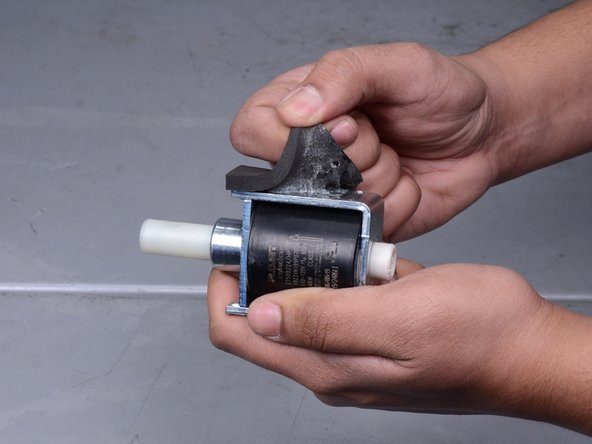
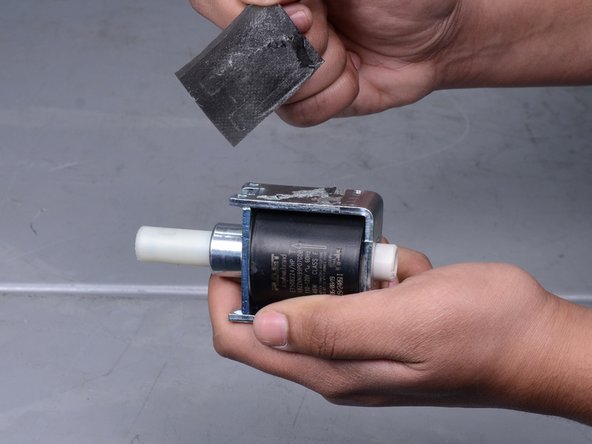
- Carefully remove the foam pad adhered to the top of the pump body.
- Keep this foam pad intact so it can be reused on the new pump during reassembly. Apply the pad to the same location on the new pump.
- Only the pump remains.