Logitech MX Ergo Disassembly
ID: 133042
Description: So I soaked my mx ergo. this is how I...
Steps:
- Remove six T6 screws from the bottom
- Slide a prying tool under the rightmost button and follow the seam back till the top half unclips
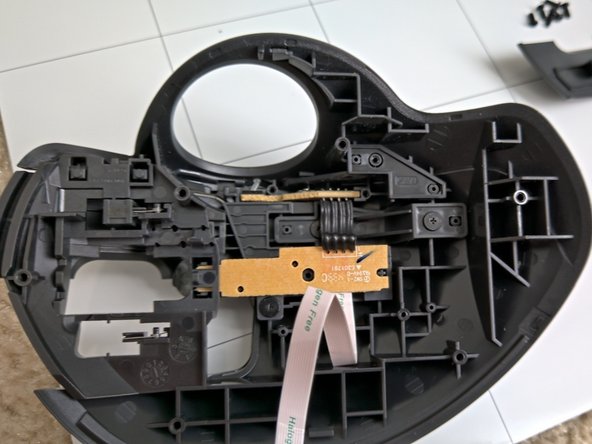
- Carefully lift the top shell.
- Do not remove the flap from the connector.
- Release the flex ribbon from its socket.
- Lever the scrollwheel sub-assembly free
- Unplug the battery from the mainboard, carefully lifting the plug marked red.
- Unscrew the three screws holding the battery submodule.
- Unscrew the bottom left screw holding down the fwd/rev buttons, lifting the assembly to the side
- Unplug the flex ribbon indicated in blue, coming from the power board below. Remove the six screws holding the main motherboard (one indicated orange here, just out of shot).
- Unscrew the three screws holding the power board i place. Take care not to loose the power switch below as you take the last bits apart.
- These three screws are a bit shorter than the rest, so keep them separate
- There you go, all disassembled. Now remove spilled coffee.
- The right click lever comes out after the bracket covering the ribbon cable
- The Right click lever comes out through the front/top of the mouse
- Then the circuit boards can be removed
- Under the circuit boards there is three piece that need to come out next
- The first has one screw and two clear pieces that transmit the light from the circuit board to the outside of the mouse and hole to allow another to pass through it
- Then the computer selector switch lever can come out the front/top of the mouse
- After that the connecting light indicator transmitter will fall out and the left click lever can be removed