CR-10S Pro Noctua Fan Upgrade
ID: 135676
Description:
Steps:
- Labeled bags are used in the following steps
- Hardware
- Power Supply Fan (Step 4)
- Rear Case Exhaust Fan(Step 5)
- Control Board Fan Assembly (Step 6)
- Using a #1 Phillips screwdriver, remove the 11 screws on the bottom and 2 screws on each side for a total of 15
- Next, remove the bottom cover
- With the bottom cover removed, turn the printer sideways and remove the power supple unit (PSU) screws while holding the PSU in place ribbon cable side up
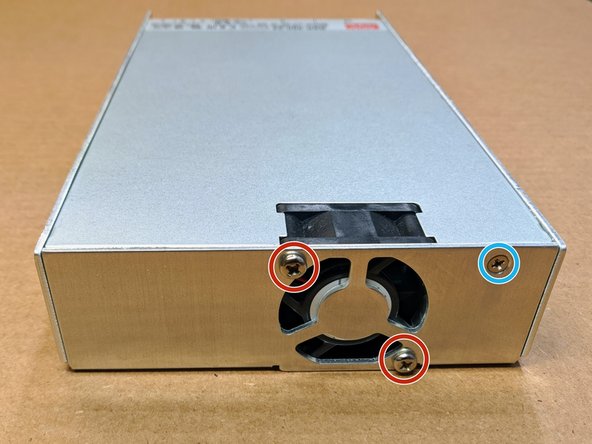
- Remove the 6 PSU screws securing the cover (circled in blue)
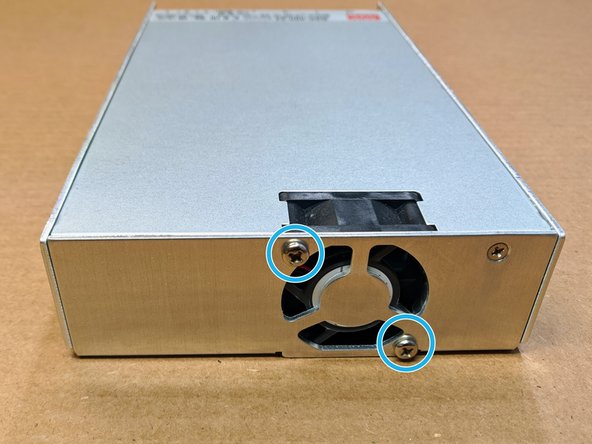
- Next, remove the 2 screws securing the original 4020 Fan (circled in red)
- Unplug the original fan cable
- Original fan cable is glued down. Gently, pull up on the cable to remove after you unplug the connector
- Route the new fan cable under the white wires
- Plug in new fan cable
- Mount fan with Self tapping screws included in the kit
- Pay attention to the fan orientation and wire placement
- Follow step 2 in reverse for reinstallation of the PSU cover
- Remove M3 Screw holding stock fan and replace the fan with the new 4010 fan using the included M3x12 socket head screws
- Fork connector for the red(+V) and black(-V) wire are mounted to there respect screw terminals on the PSU
- Remove original motherboard mounting screws and save for future step
- Included Nylon standoffs replace control board mounting screws
- Make sure SD card slot and USB cable slot maintain alignment with the frame cutouts
- Place the Control Fan Assembly as shown
- Use the previously remove M3 screws to secure the 3D printed fan mount to the standoffs.
- Plug in Fan adapter cable