Huawei Watch 2 Battery Assembly Replacement
ID: 135683
Description: Use this guide to replace a worn-out or dead...
Steps:
- Before starting repairs, take your watch off the charger and power it down.
- Feel free to attach or remove the watch band as needed to provide more control as you make repairs.
- Remove the four Torx T2 screws (4.5 mm length).
- Use a pair of tweezers to remove the four plastic covers sitting next to the watch band holders.
- Insert an opening tool into the gap between the back cover and the watch case at the bottom edge of the back cover.
- Use the opening tool to pry up the back cover of the Huawei Watch 2.
- Do not remove the back cover assembly all the way yet—it's still connected to the mainboard.
- Carefully fold the back cover assembly to the opposite side of the two watch crowns.
- Remove the Phillips #00 screw (1.8 mm length).
- The heart rate sensor flex cable is attached to the metal shield which covers the battery connector. In order to avoid damage to the flex cable, only grab the metal shield on the bottom end where the Phillips screw was located.
- Use a pair of tweezers to carefully remove the metal shield.
- Remove the back cover assembly.
- Use the flat end of a spudger to pry up and disconnect the battery flex cable.
- Remove the two Phillips #00 screws (1.8 mm length).
- Use a pair of tweezers to remove the metal shield covering the display and the digitizer flex cables.
- Use the flat end of a spudger to pry up and disconnect the digitizer flex cable.
- Use the flat end of a spudger to pry up and disconnect the display flex cable.
- Avoid damaging the resistors on top of the motherboard during the following removal procedure.
- The motherboard and the battery assembly are held together by two screws on the bottom of the motherboard. In order to replace the battery assembly, you need to pry the full assembly out of the watch frame.
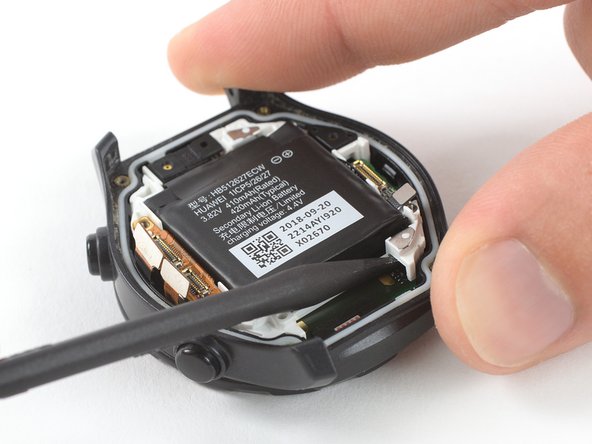
- Insert the pointed end of a spudger into the recess at the bottom right corner of the white battery frame.
- Use the spudger to pry up the right corner of the assembly consisting of the battery and the motherboard.
- Insert the pointed end of a spudger into the recess at the bottom left corner of the white battery frame.
- Use the spudger to pry up the left corner of the assembly consisting of the battery and the motherboard.
- Use a pair of tweezers to remove the battery and motherboard assembly.
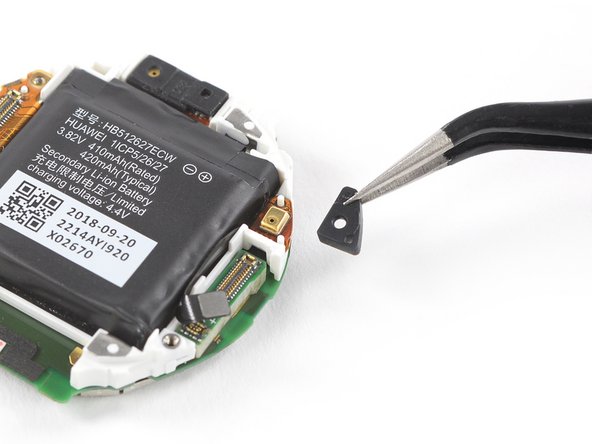
- Use a pair of tweezers to remove the black rubber gasket from the microphone next to the top right corner of the battery.
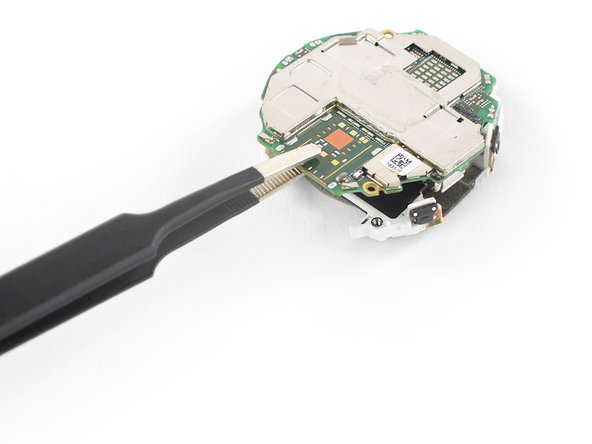
- Remove the two Phillips screws (1.8 mm length) from the bottom of the motherboard.
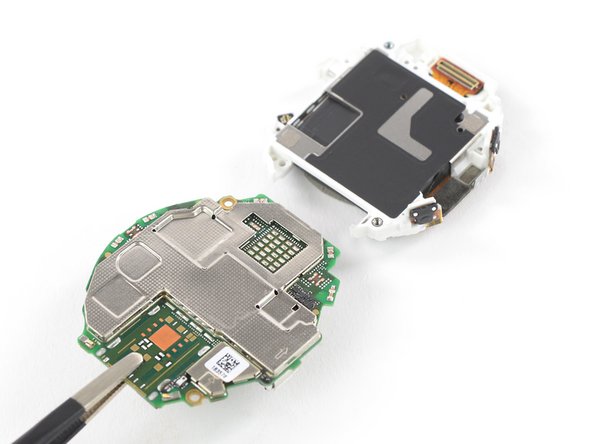
- Use a pair of tweezers to remove the motherboard from the battery assembly.
- At this point during reassembly make sure that the flex cable on the bottom side of the battery assembly is connected to the motherboard.
- Before reassembly check your new part for any components that might need to be transferred from the old one.